Add New Widget
To add a new widget:
-
On the Home page select +.
-
The Add New Widget dialog appears.
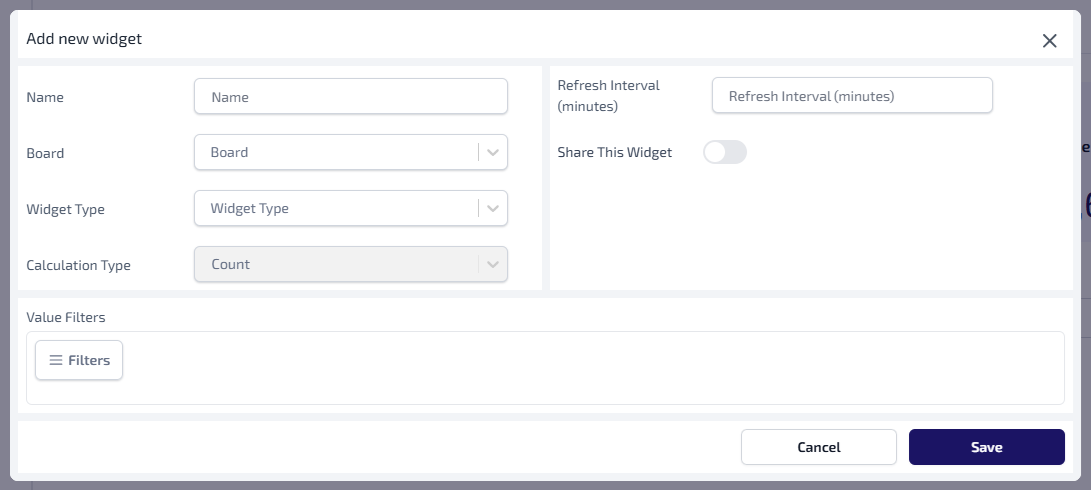
Enter the following information for the widget.
-
Enter the widget Name*. This is the name shown on the dashboard, and can be a max of 30 characters long.
-
Select the Board* dropdown, then select the board on which you want the widget to display. The options are:
-
Overview
-
HHRS
-
Condition
-
Compliance
-
Lifecycle
-
Summary
-
-
Select the Widget Type* dropdown, then select the type of widget you want to add. This dynamically shows the additional fields to be configured. The options are:
-
Calculation Type - this field cannot be updated and shows how the data is aggregated, which currently is Count.
-
Select Filters to display the Filters dialog, configure the filters you want to apply. For more information see Filters.
-
Enter the Refresh Interval (minutes) into the field. This determines how frequently the data on the widget is updated.
-
Select the Share This Widget toggle to determine whether the widget is to be viewable to all users, or just viewable to you.
-
Select Save. The widget is automatically added to the specified board.
*These are required fields.
Widget Configuration
Information Widget
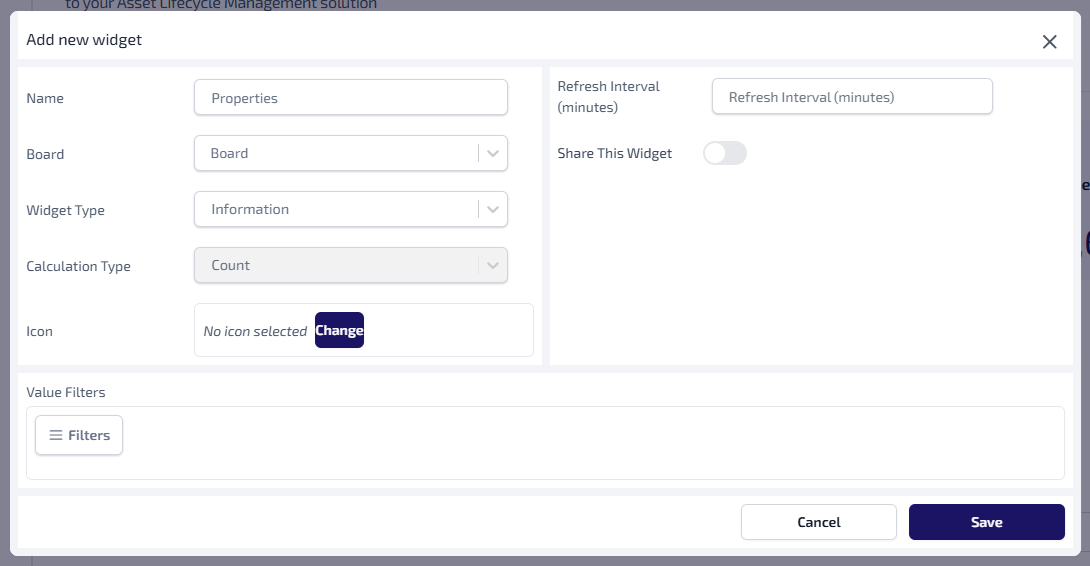
To configure an Information widget:
-
On the Add New Widget dialog, select Change in the Icon field.
-
The Choose Icon dialog appears.
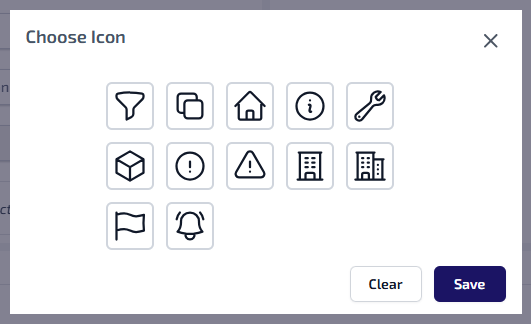
Select the icon to appear on the widget.
-
Select Save.
Percentage Widget
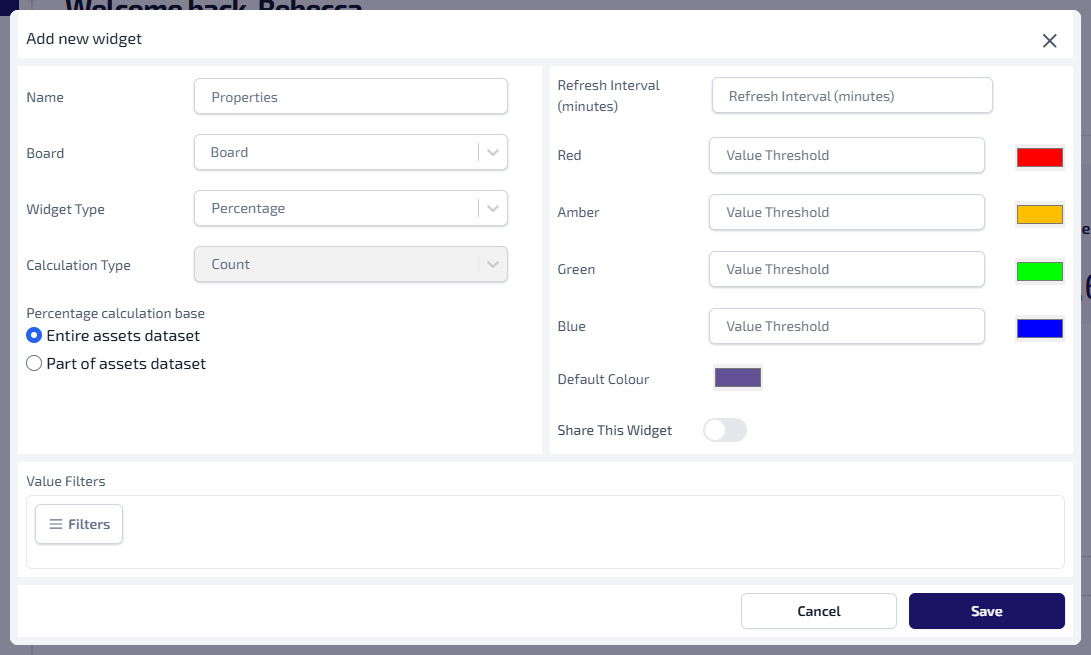
To configure a Percentage widget:
-
On the Add New Widget dialog, select whether the Percentage Calculation Base is to be:
-
Entire Asset Dataset - bases the percentage calculation on all of your assets.
-
Part of Asset Dataset - allows you to configure an additional Calculation Base filter. For more information on applying filters see Filters.
-
-
Enter the Value Threshold for the following:
-
Red
-
Amber
-
Green
-
Blue
The colour of the widget changes according to the values entered.
-
The default colours can be changed by selecting a custom colour via the colour picker adjacent to the applicable Value Threshold field.
-
If required, select the Default Colour and select a new colour from the colour picker.
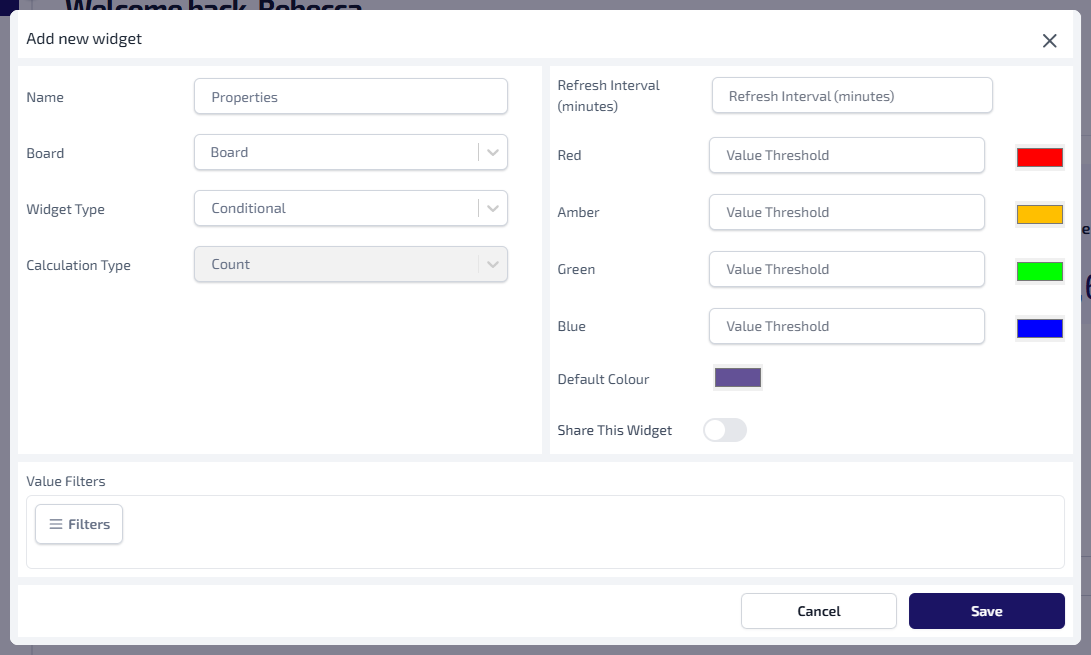
Conditional Widget
To configure a Conditional widget:
-
On the Add New Widget dialog, enter the Value Threshold for the following:
-
Red
-
Amber
-
Green
-
Blue
The colour of the widget changes according to the values entered.
-
The default colours can be changed by selecting a custom colour via the colour picker adjacent to the applicable Value Threshold field.
-
If required, select the Default Colour and select a new colour from the colour picker.
Preview Widget
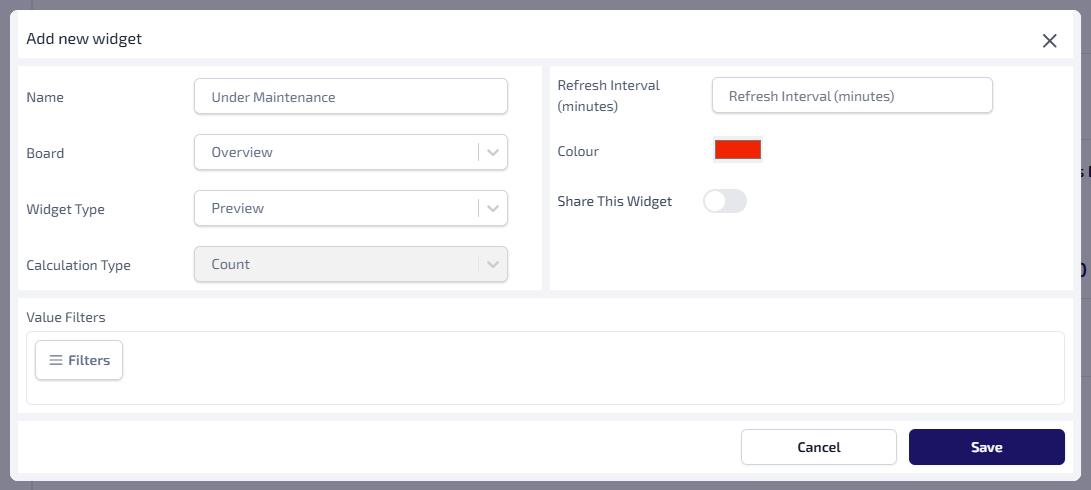
To configure a Preview widget, if required, select the Default Colour and select a new colour from the colour picker.
Filters
Filters can be added to Value Filters, and where applicable Calculation Base filters, by either creating a new filter, or using a saved filter.
New Filter
To create a new filter:
-
On the Add New Widget dialog, in the Value Filters section, select Filters.
-
The Filters dialog appears.
-
Select the
 to expand the required category.
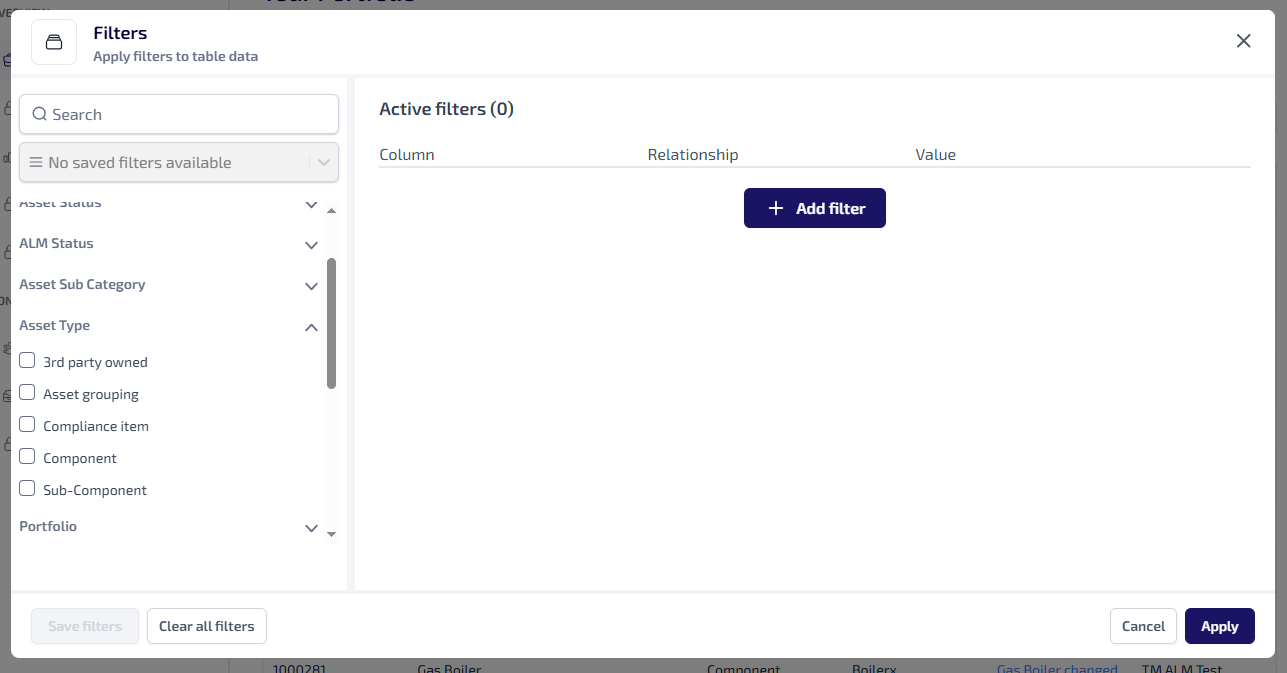
-
Select a checkbox next to the filter you want to add.
-
Selected filters display in the Active Filters section.

-
Active Filters are populated with the following:
-
Column - the selected category name
-
Relationship* - Is equal to
-
Value - the selected category item
-
-
If required, select additional categories and category items.
-
When you have selected all required filters, select Apply.
-
On the Add New Widget dialog, the Value Filters section updates to show which filters have been applied.

*The only Relationship currently supported by all filter conditions is Is equal to.
When filtering by Asset Installation Date and using a Custom Date Range, ensure the From date is earlier than or equal to the To date.
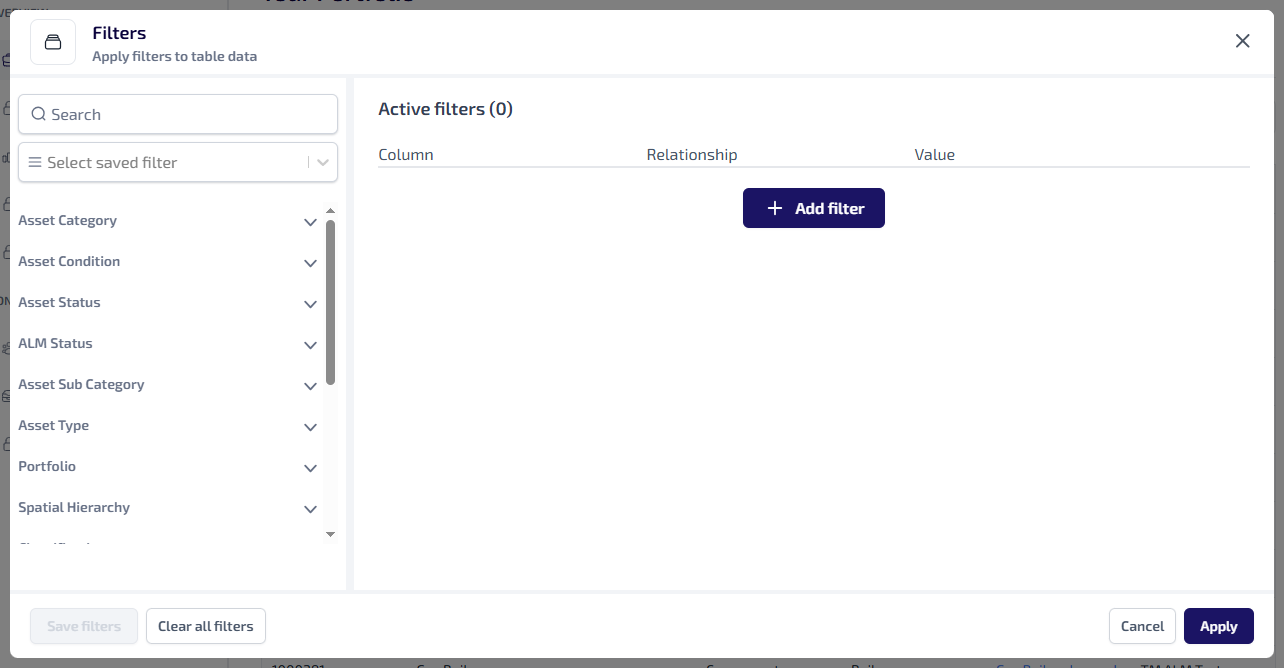
Saved Filter
To use a saved filter:
-
On the Add New Widget dialog, in the Value Filters section, select Filters.
-
The Filters dialog appears.
-
Click the Select Saved Filters dropdown, then select the required filter.
-
The saved categories and category items display in the Active Filters section.
-
Select Apply.
-
On the Add New Widget dialog, the Value Filters section updates to show which filters have been applied.