Documents
The Asset Details > Documents tab shows you the documents associated with the selected asset, and is where documents can be uploaded against the asset.
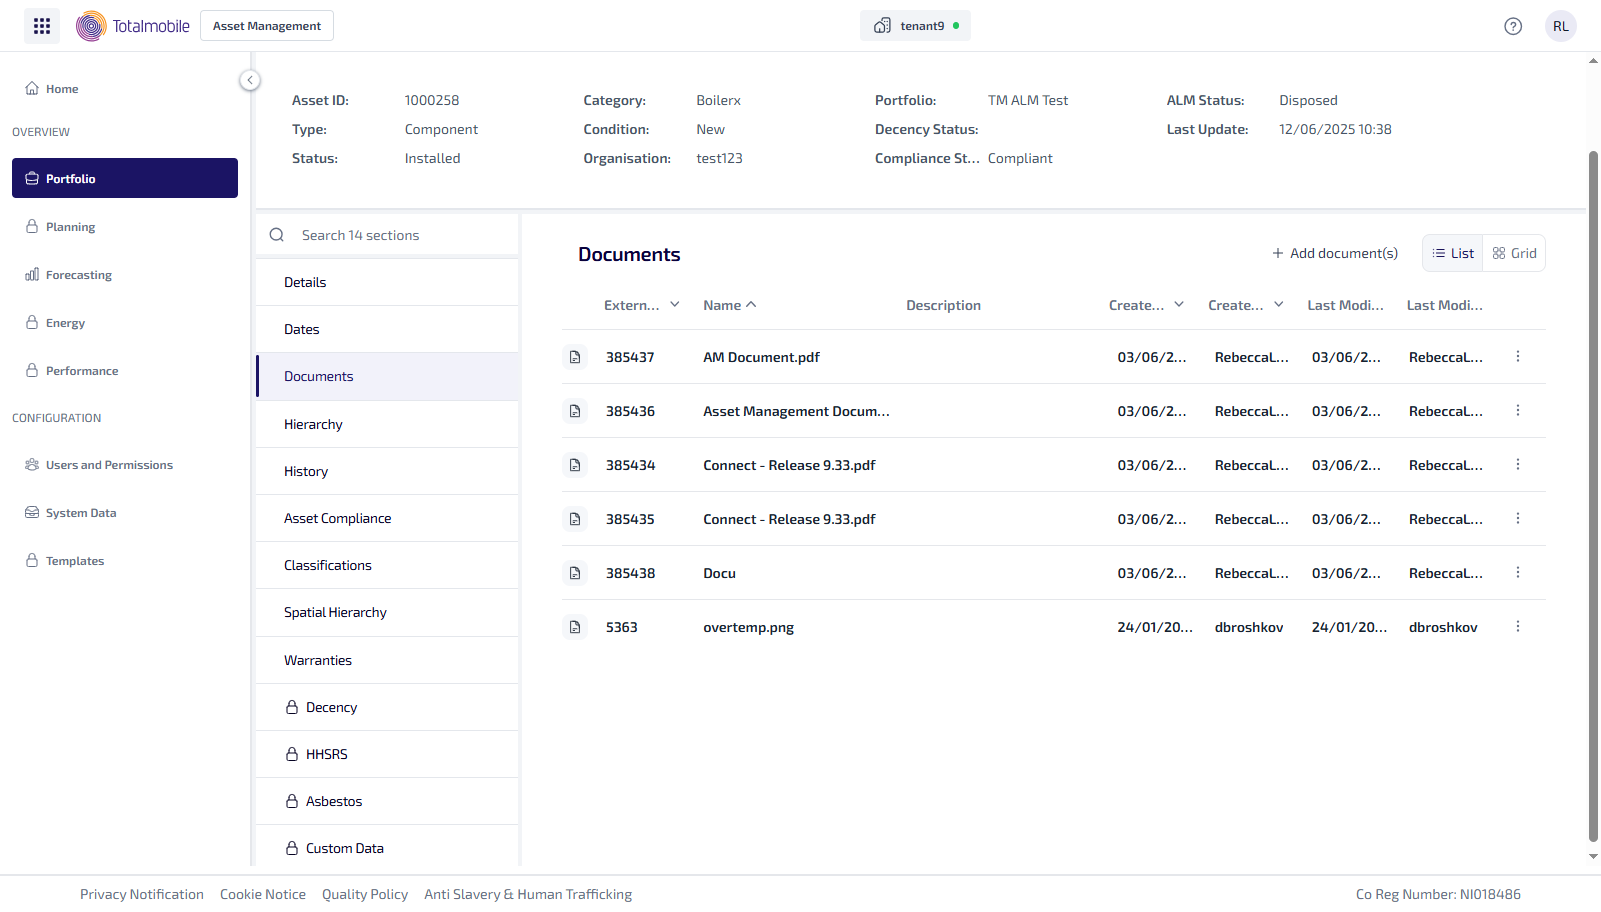
The Documents tab is shown in List view by default, but can also be shown in a Grid view with a tile for each document.
The Documents tab shows the following information:
-
External ID - the unique identifier created by Asset Management when the document is uploaded.
-
Name - the name of the document uploaded.
-
Description - the description provided when the document was uploaded.
-
Created At - the date and time the document was first uploaded.
-
Created By - the name of the user who first uploaded the document.
-
Last Modified At - the date and time the document was last uploaded.
-
Last Modified By - the name of the user who last uploaded the document.
-
Select this for the following options:
-
More Information - select to show the Document Overview panel. This shows the document information and meta data stored against the document in the Document Vault.
-
Download - select to download the document.
-
To upload a new document:
-
From the Portfolio page, select the asset in the Asset Register.
-
Select View Asset.
-
The Asset Details page is shown, select the Documents tab.
-
Select +Add Document(s).
-
The Upload Document dialog appears.
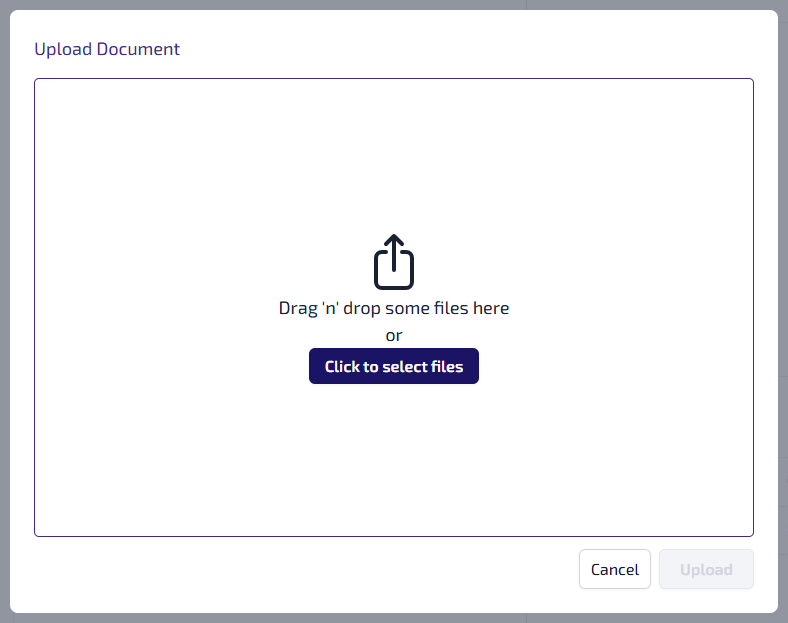
You can either:
-
Drag and drop the file into the dialog.
-
Select Click to select files, browse and select the required file or files, select Open.
-
-
The file appears in the Upload Document dialog.
You can:
-
+Add Custom Metadata - select to add additional fields against the file when it’s stored in the Document Vault. Select the Select an option field and pick a custom field from the dropdown list, which is populated with the custom field available in the Document Vault. Then enter the relevant text into the Enter text field.

-
 - select to delete the file from the Upload Document dialog.
 -
Document Name - if required, change the name of the file.
-
Description - if required, enter a description of the file.
-
-
Select Upload.
-
The file, or files, are uploaded to the Document Vault and are listed in the Documents tab.