Import Dashboard - Import
The Import feature lets you add and update assets by importing them as a .csv file, meaning large amounts of asset data can be added into the system in a structured and controlled way.
The process is divided into clear steps, ensuring the data is validate before it is saved into the database.
To import an asset file:
-
Select the Import tab from the Portfolio page.
-
On the Import Dashboard, select Import.
-
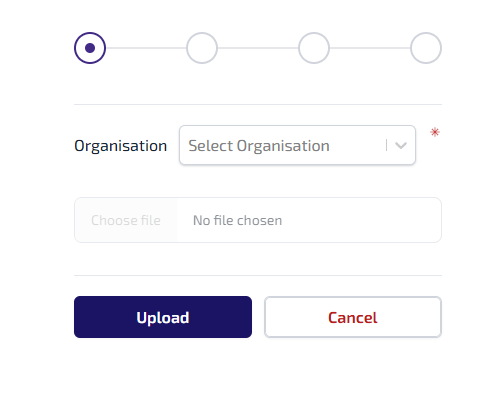
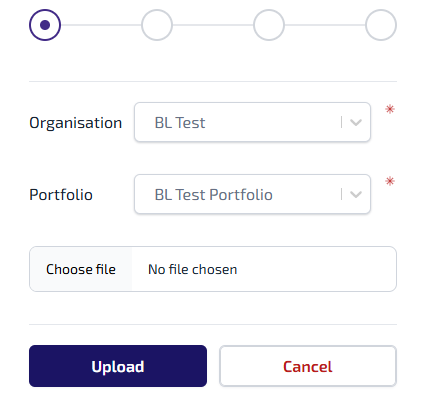
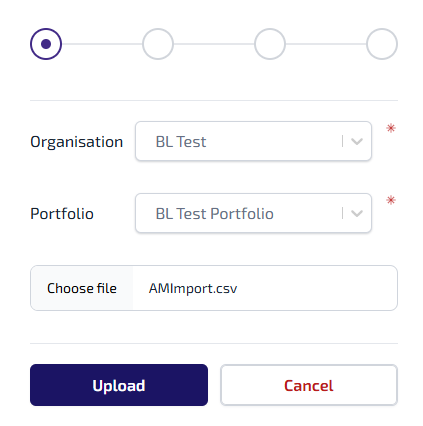
The new import page opens. From the Organisation* dropdown list, select the organisation to import the assets into.
-
From the Portfolio* dropdown list, select the portfolio associated with the assets being imported.
*Only active organisations and portfolios are shown in their respective lists. If either are not listed, check their status.
-
Select Choose file, browse and select the required file to import, select Open.
-
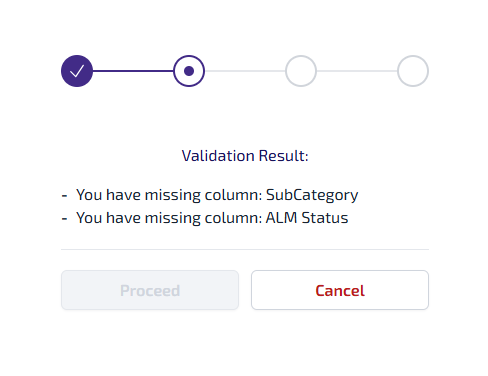
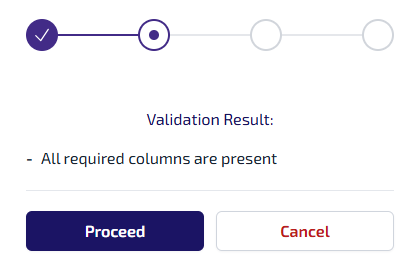
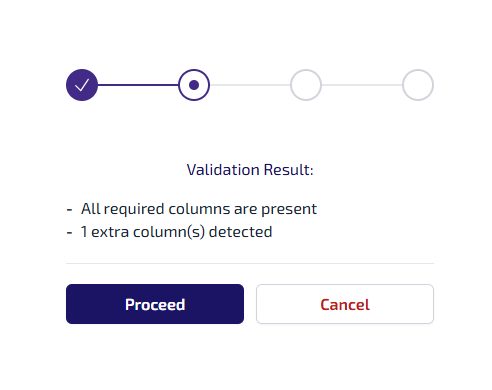
Select Upload. The system beings validating the file, it checks the following:
-
Whether all mandatory columns are present, for more information on mandatory columns and the import file preparation refer to Import Dashboard - Import File Preparation.
-
Whether any extra columns are included.
-
If there are any critical errors, such as mandatory columns missing, the import cannot continue, and you must correct the file.
-
When the validation passes, select Proceed.
-
A confirmation message is shown with an Import ID.
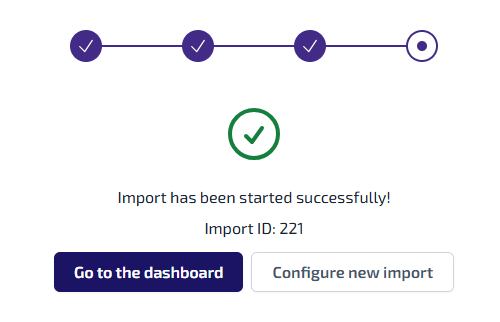
You can either:
-
Go to the dashboard - select to return to the Import Dashboard.
-
Configure new import - select to start a new import.
-
Extra Columns
If extra columns are detected as part of the validation process, you are asked to confirm whether these additional columns should be included.
To confirm whether the additional columns should be included:
-
On the Validation Result screen select Proceed.
-
You are shown a table listing all additional columns, with the column name from the uploaded .csv file, and the name of the matching custom field in Connect.
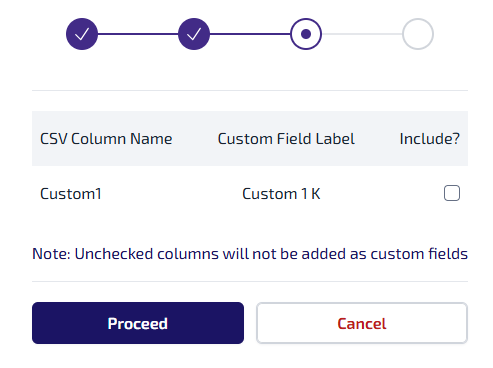
For more information refer to Custom Fields.
-
For each additional column you can:
-
Select the Include? checkbox to import the column as a custom field attached to the asset.
-
Leave the Include? checkbox clear to confirm you do not want to import the column.
-
Select Proceed.
-
A confirmation message is shown with an Import ID.
You can either:
-
Go to the dashboard - select to return to the Import Dashboard.
-
Configure new import - select to start a new import.