Configure Your SCIM - Azure Entra ID
The steps to configure your SCIM Azure Entra ID are as follows:
Create an Azure Entra Enterprise Application
To create an Azure Entra Enterprise Application:
-
In the Azure Portal, navigate to Azure Entra.
-
Select New Application.

-
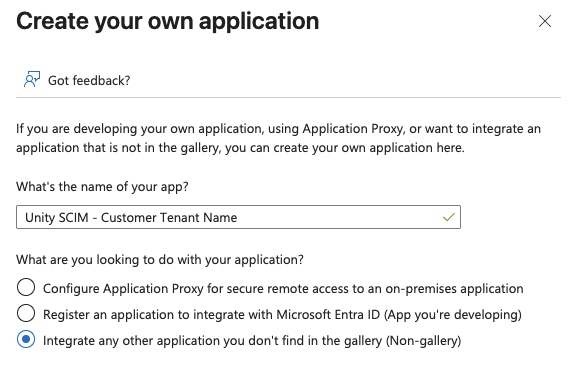
Select Create your own application.

-
Enter a name for the application and select Integrate any other application you don’t find in the gallery (Non-gallery).
-
Select Create to create the application.
Configure Provisioning
To configure the provisioning:
-
Select the Provisioning menu in your Enterprise Application.
-
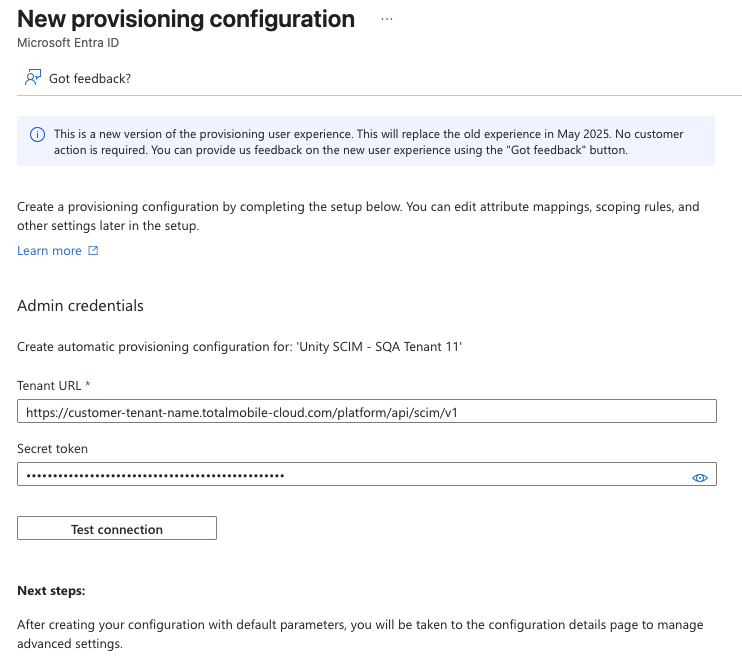
Select New configuration.
The Tenant URL within the Provisioning section of your Enterprise Application refers to the target SCIM endpoint.
In Totalmobile, the SCIM endpoint follows a predictable pattern, using the Customer Tenant’s Hostname, for example:
Customer Name: TestCustomer
https://testcustomer.totalmobile-cloud.com/platform/api/scim/v1
-
Enter the Tenant URL and Secret Token.
The Secret Token will be the Personal Access Token for your SCIM Service User and is provided by Totalmobile.
-
Select Test connection to verify Azure Entra is able to communicate successfully with the provided URL and token.
-
When the test connect is successful select the Save icon at the top of the page.
Configure Mapping
To configure the mapping:
-
Select the Attribute mapping menu.
-
Select Provision Microsoft Entra ID Users.
-
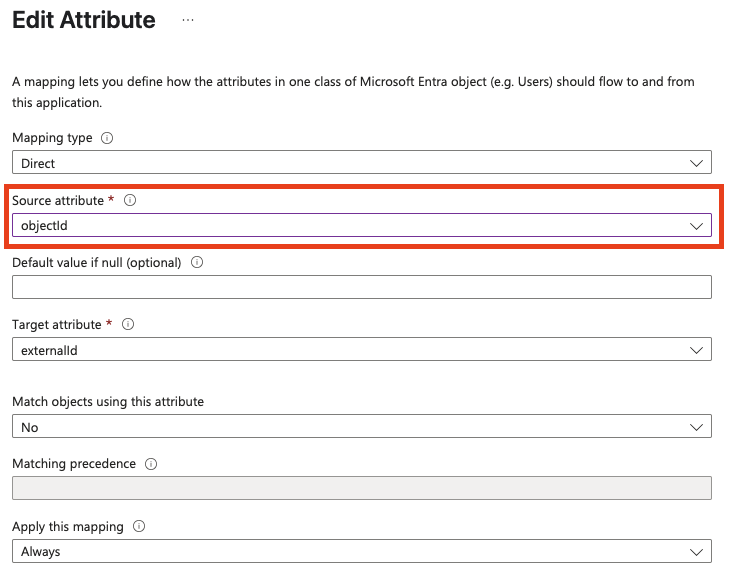
Locate the externalId attribute and select Edit.
-
Change the Source attribute to objectId.
-
Select Save.
Provision Users
To provision your users:
-
In your Azure Entra ID Enterprise Application, select the Users and groups menu.
-
Select the which Users are to be provisioned by the integration.
-
Navigate back to the Overview menu.
-
Select Start provisioning.
-
The provisioning starts and runs in the background.