Visits Workflow
The Visits Workflow outlines the possible pathways visit processes take for users.
For example, you can add a default workflow to your solution, which means Totalmobile logs when users:
-
Accept visits
-
Travel to visits
-
Start visits
-
Complete visits
The workflow is made up of statuses, for example New, and status flows, for example New to Accept, both of which you can customise. For example, you can define the Accept to On Way status flow to record user location, or trigger a form when users complete visits.
Create a Workflow
-
In WebAdmin select Solutions.
-
Select a Solution.
-
In the Settings pane, go to the Workflow section and select Edit Workflow Details.
-
Select Create Default Workflow
 .
. -
In the Please Confirm dialog, select Confirm.
The default workflow consists of five statuses: New, Accept, On Way, Arrived and Complete.

Each status is a grey rectangle, and the status flows are the bridges between statuses.
-
To add a status, select and drag the Add a New Status icon
 onto the workflow page.
 -
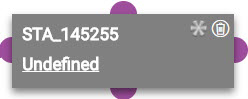
On the new status, select Undefined.
-
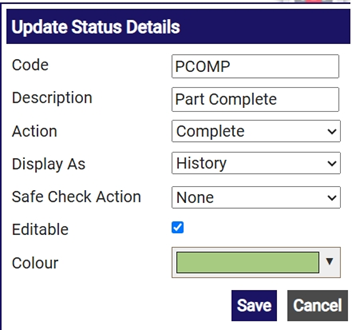
In the Update Status Details dialog:
-
Enter a Status Code.
-
Enter a Description.
-
Select the Action field, then select an action type from the dropdown.
For Jobs to have a status indicator in the Job List, or to have colour-coded states in Optimise Schedule or the Diary on the Totalmobile app, you must set up the Action types in the RM_WORK_ITEM_VISIT_STATE Scheduler database table:
WVS_VISIT_STATUS: Workflow status Code e.g. HELD.
WVS_STATE: Committed, Held, Started or Travelling. -
Select the Display As field, then select an option from the dropdown.
-
To enable or disable the Safe Check Action for this status, select an option from the dropdown. By default there is no safe check configured.
-
Select Editable to allow the visit to be edited, for example to add a task when at that status.
You can also use the Editable option to prevent users from having multiple visits at this status at any one time. This encourages users to move visits to a non-actionable state before starting a new visit, rather than working on multiple visits at once.
To enforce editing one visit at a time, you must assign the Edit Single Visit permission to users. For more details refer to Permissions in the Administrator Guide.
-
To edit the colour for the status, select the Colour field, then select a colour from the dropdown. You can choose a colour from the predefined options, or select your own from the colour wheel.
The status colour appears in the Visits list in the Totalmobile app, on the map pin and icons in the Visit Detail screen, and in the app Diary.
Status colour configuration is only available for Android devices.
-
Select Save.
-
-
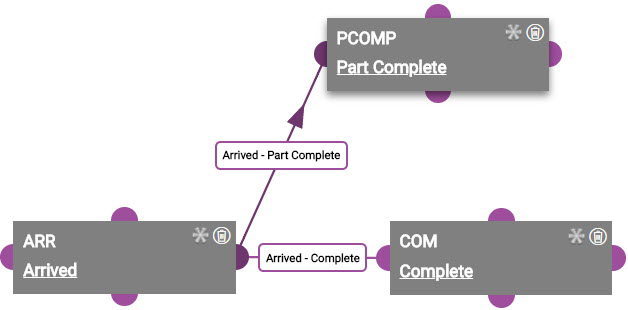
Select and drag a node to or from the new status to create a bridge with another status. This creates a status flow, for example Arrived to Part Complete.
-
Hover your cursor over the Status Flow between two statuses, then select it when it changes colour.
-
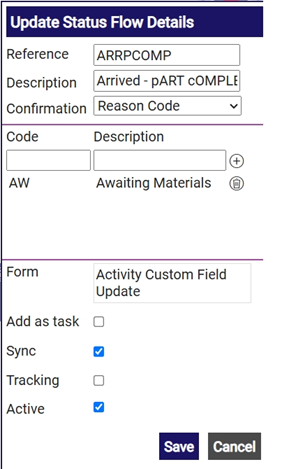
In the Update Status Flow Details dialog:
-
Enter a status flow Reference.
-
Enter a status flow Description.
-
Select the Confirmation field and select a confirmation type from the dropdown. Yes requires a confirmation upon status change, and No does not.
If you select Reason Code, enter a reason Code and Description, then click Add
 .
. -
To configure the status flow to trigger a form, select the Form field and select a form from the dropdown.
You can ensure the status flow cannot progress without form completion by including a mandatory field in the form. For more details refer to the Forms User Guide.
-
To allow the entered form values to be changed at a later date if required (unless the Form is marked as Submit on Complete), select Add as Task.
-
Select Sync to force a sync upon the status change both from server to mobile and mobile to server.
There is a sync upon every status change from mobile to server regardless of this option.
-
Select Tracking to ensure users submit their location upon the status change.
-
Select Active to enable the status availability. If left unchecked the status cannot be used.
-
Select Save.
-
-
To create a status, for example Cancelled, that you can change to from any other status, select the Add Wildcard
 icon on the status.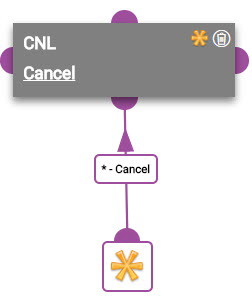
 Updating the Status of Visits on Android
-
On the Home screen of the Totalmobile app, select Visits.
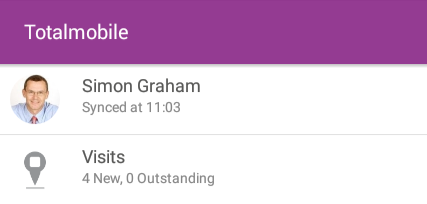
The Visit List and Diary appear.
-
Select a Visit.
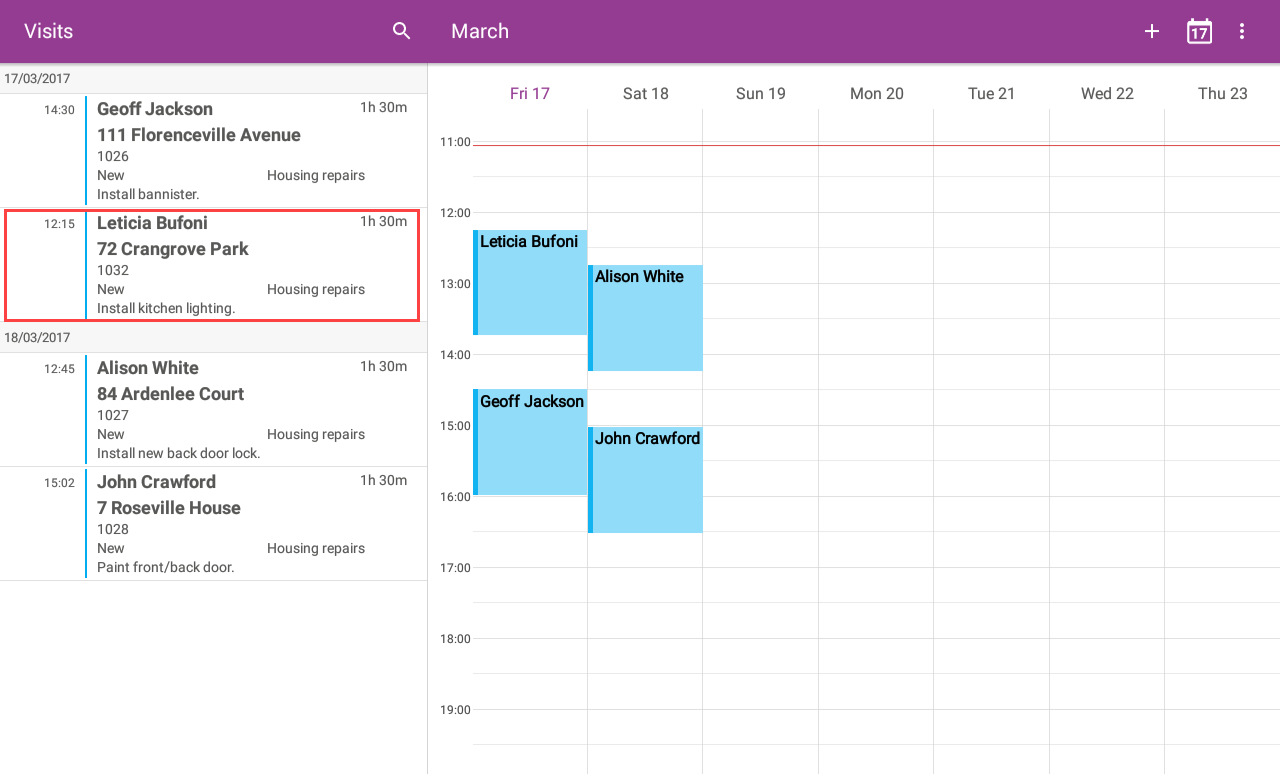
The Visit Detail appears.
-
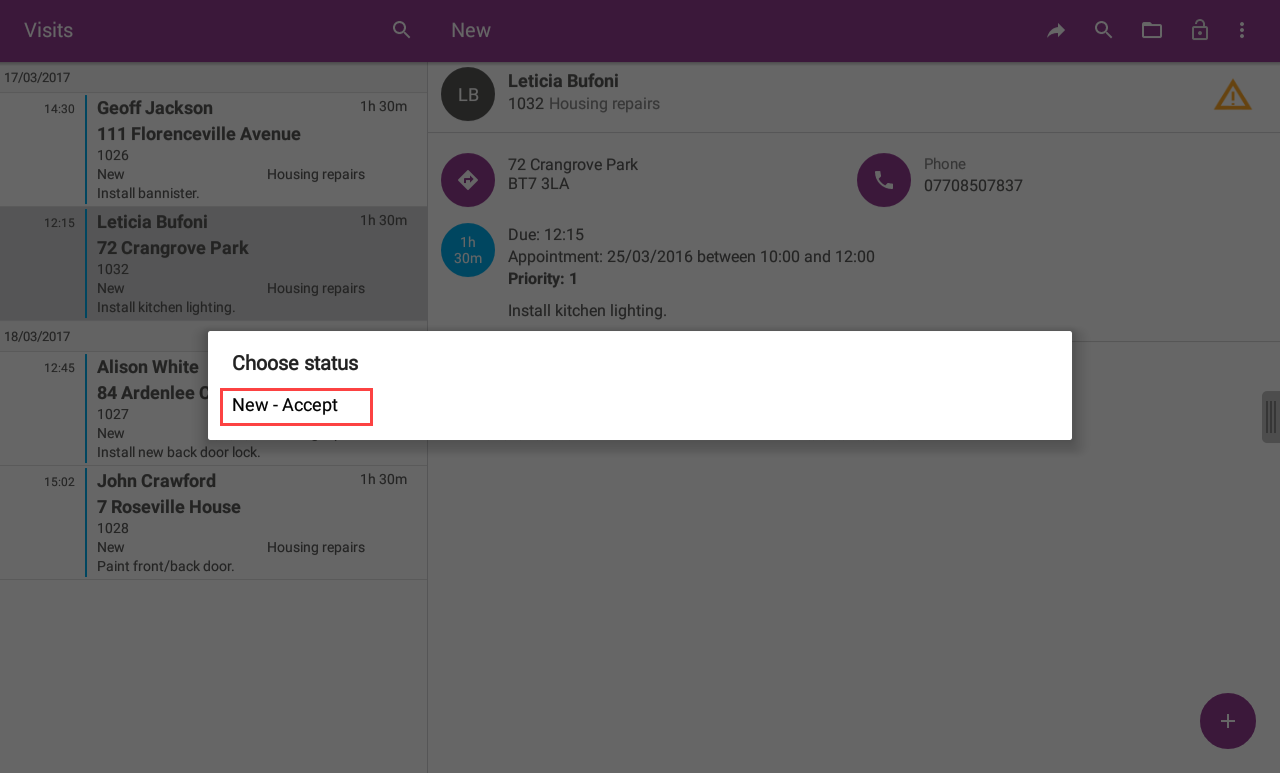
To change a visit status, select the Submit icon.
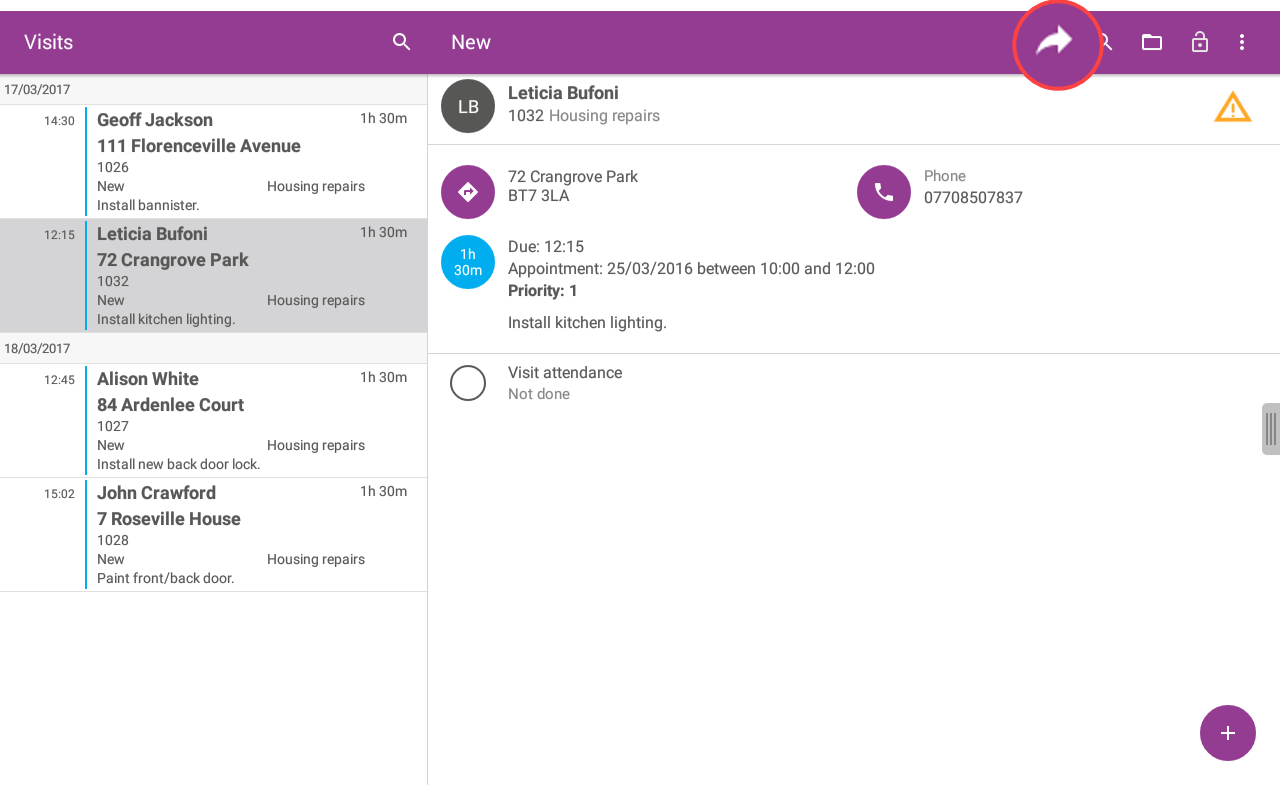
The New - Accept and Cancel options appear.
-
Select New - Accept.
The visit is no longer a new visit and Totalmobile categorises it within the Outstanding section of visits.
-
Select the Submit icon.
The Accept - On Way and Cancel options appear.
-
Select Accept - On Way, then select Submit.
The On Way - Arrived and Cancel options appear.
-
Select On Way - Arrived, then select Submit.
The Arrived - Complete and Arrived - Part Complete options appear.
-
Select Arrived - Part Complete.
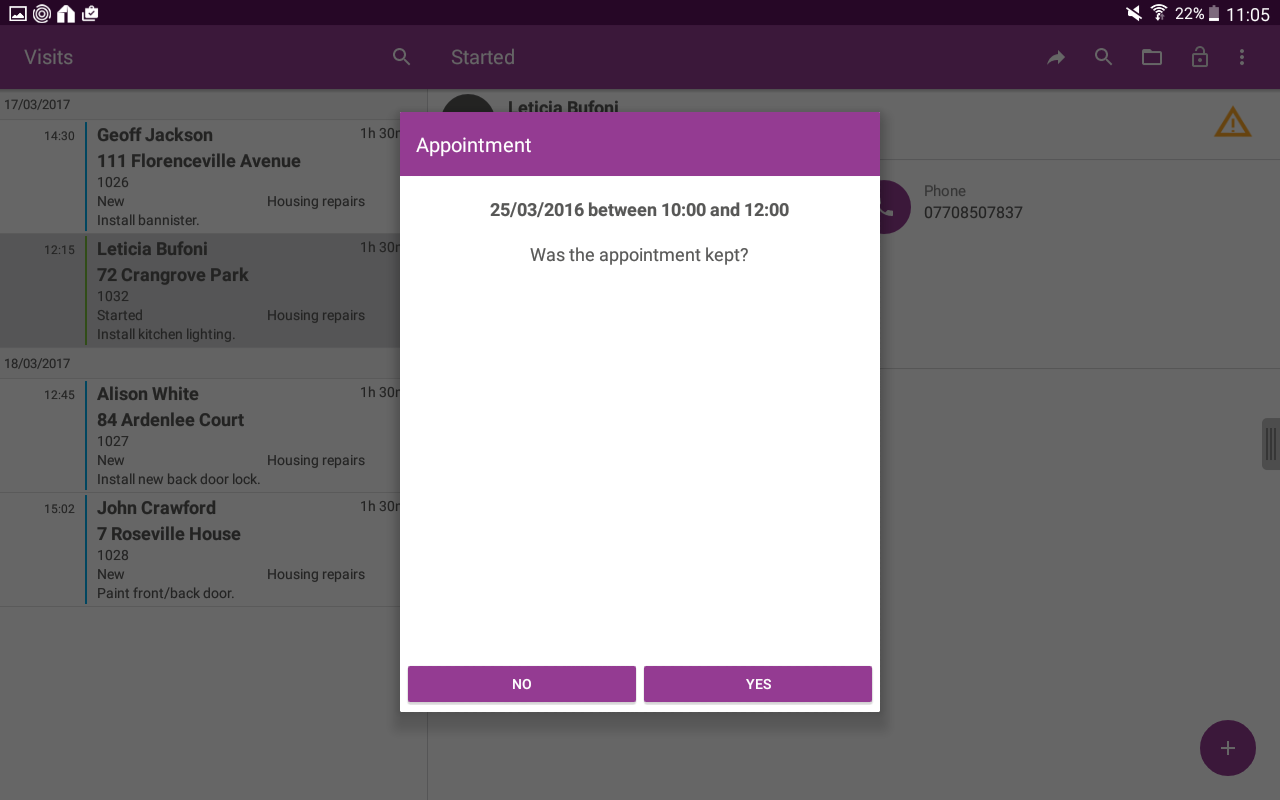
The Appointment window appears.
-
Select Yes or No for Was the appointment kept?
-
The Kept Reason or Missed Reason window appears. Select Choose Reason.
-
Select a Reason.
-
Enter Notes.
-
Select the tick icon.
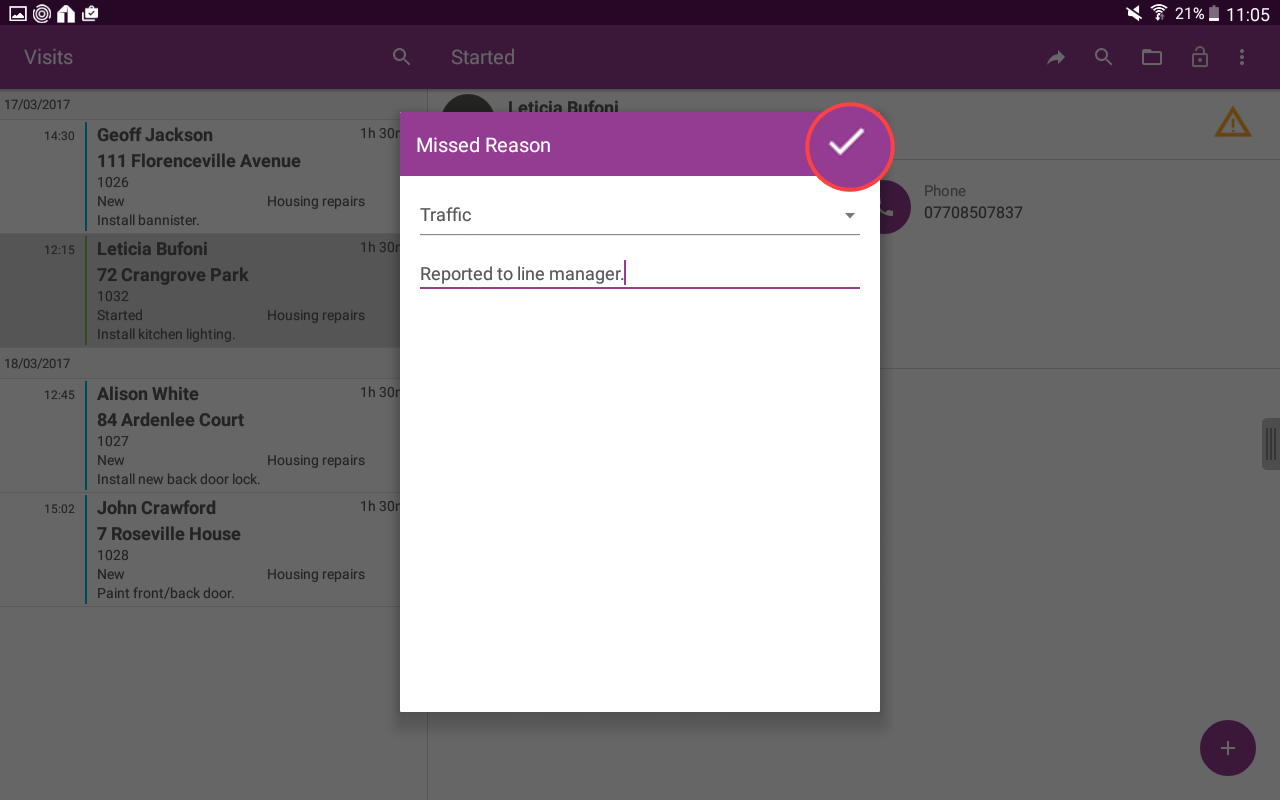
The visit is completed.
-
Updating the Status of Visits on iOS
-
On the Home screen of the Totalmobile app, select Visits.
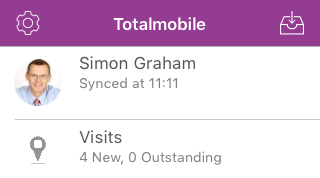
The Visit List and Diary appear.
-
Select a Visit.
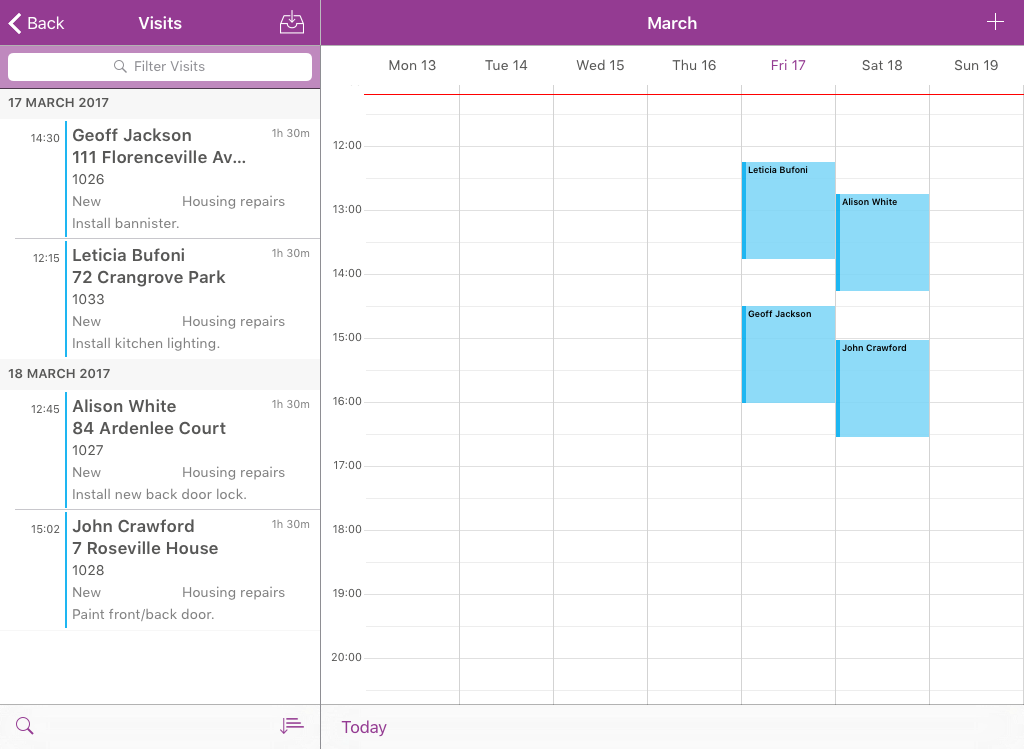
The Visit Detail appears.
-
To change a visit status, select the Submit icon.
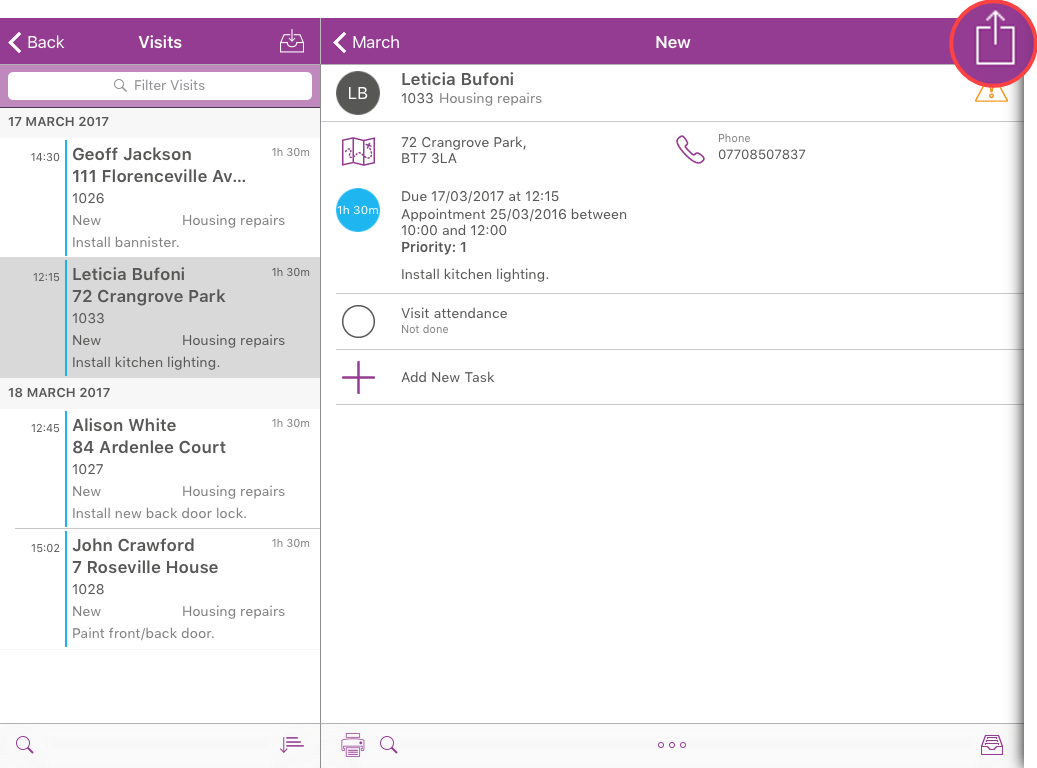
The New - Accept and Cancel options appear.
-
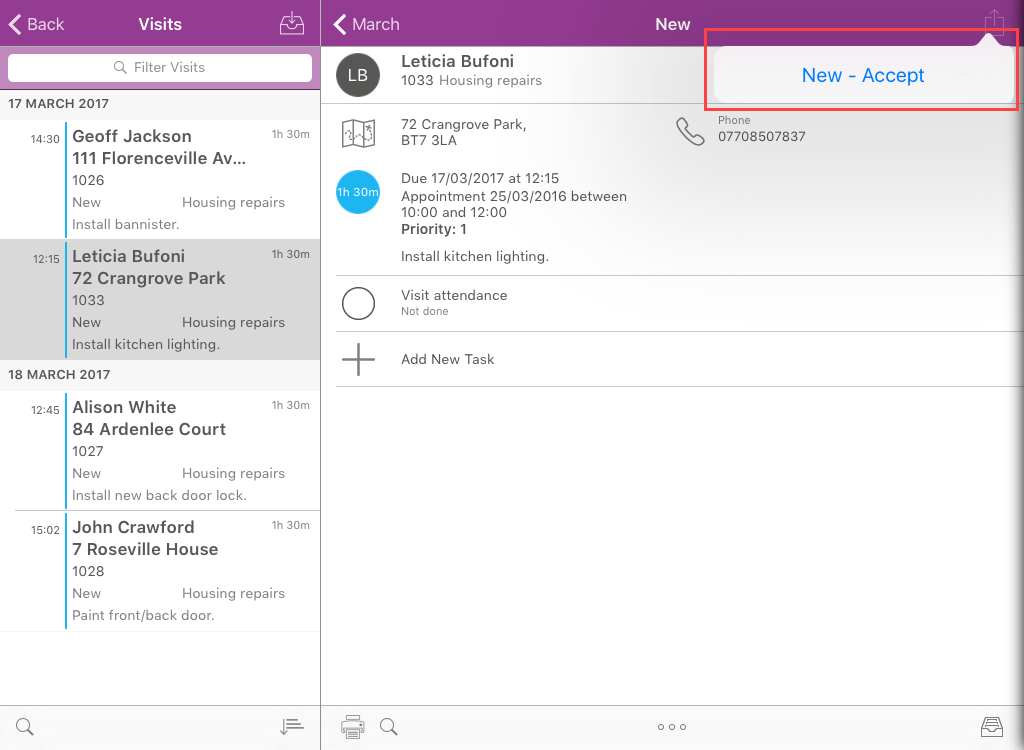
Select New - Accept.
The visit is no longer a new visit and Totalmobile categorises it within the Outstanding section of visits.
-
Select the Submit icon.
The Accept - On Way and Cancel options appear.
-
Select Accept - On Way, then select Submit.
The On Way - Arrived and Cancel options appear.
-
Select On Way - Arrived, then select Submit.
The Arrived - Complete and Arrived - Part Complete options appear.
-
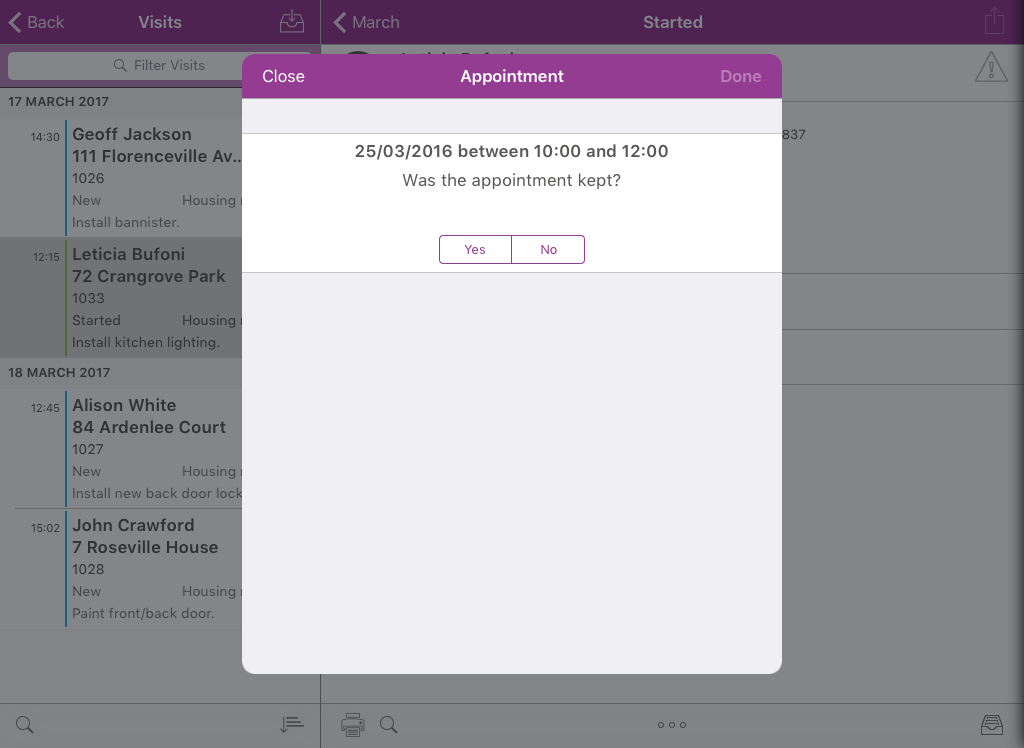
Select Arrived - Part Complete.
The Appointment window appears.
-
Select Yes or No for Was the appointment kept?
-
Select Select Reason.
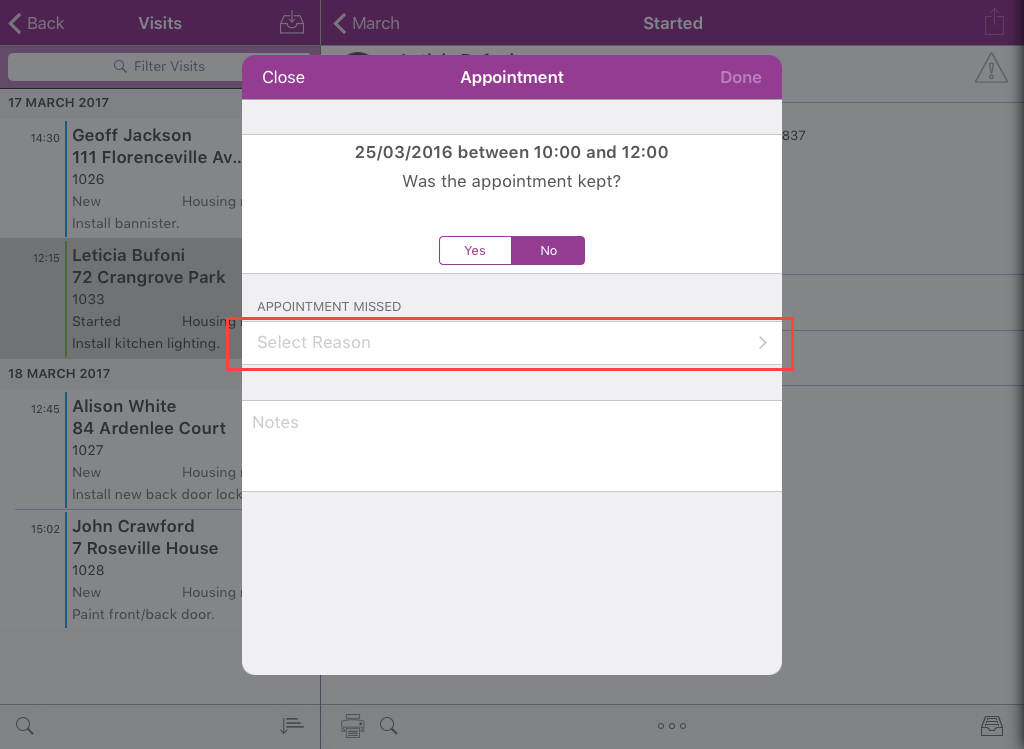
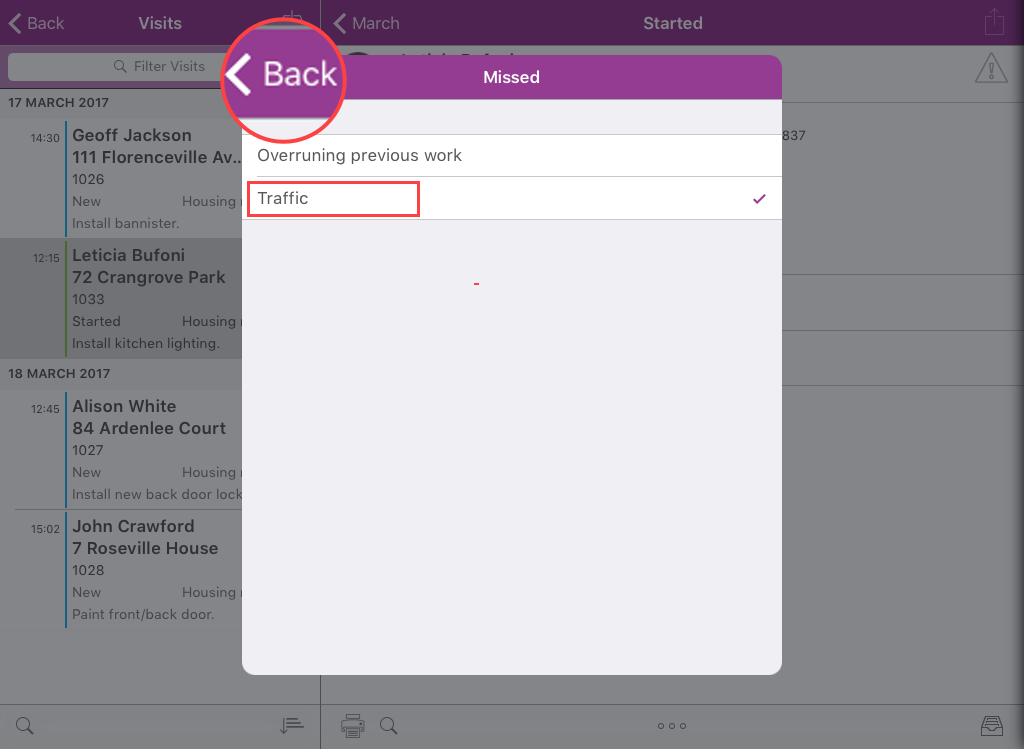
The Kept or Missed window appears.
-
Select a Reason.
-
Select Back.
-
Enter Notes.
-
Select Done.
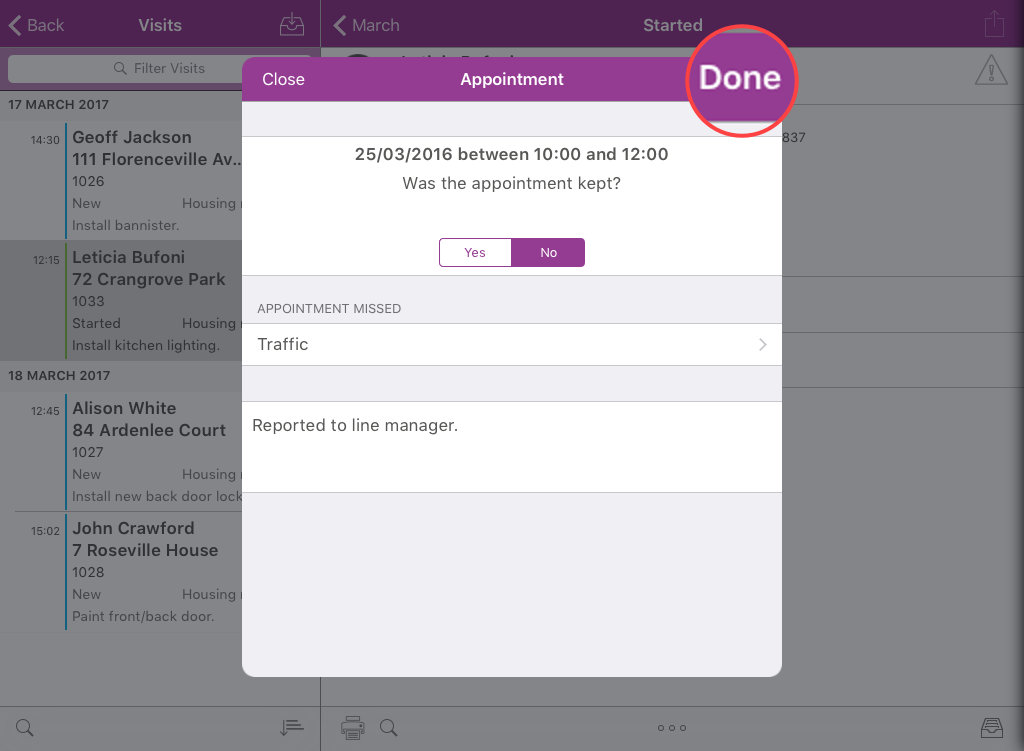
The visit is completed.
-
Updating the Status of Visits on Windows
-
On the Home screen of the Totalmobile app, select Visits.
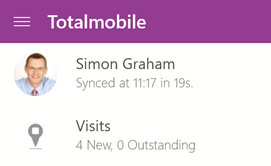
The Visit List and Diary appear.
-
Select a Visit.
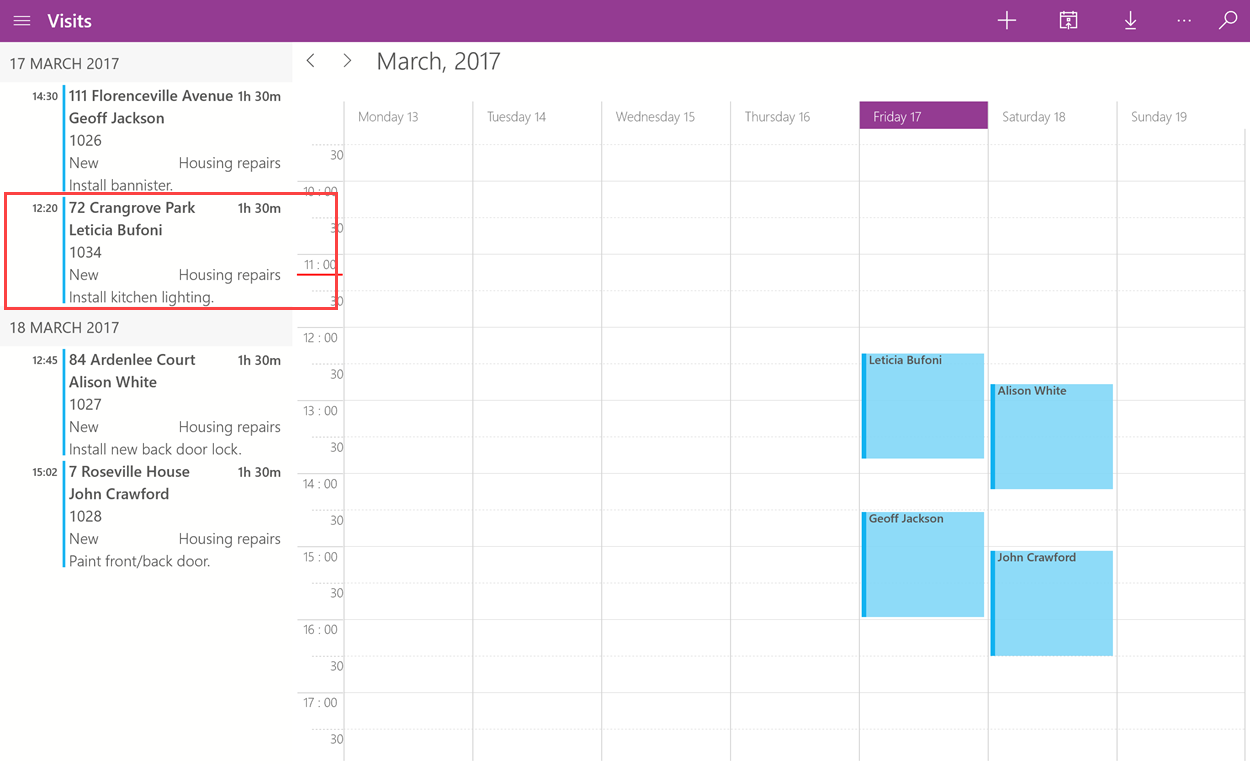
The Visit Detail appears.
-
To change the status of a visit, select the Submit icon.
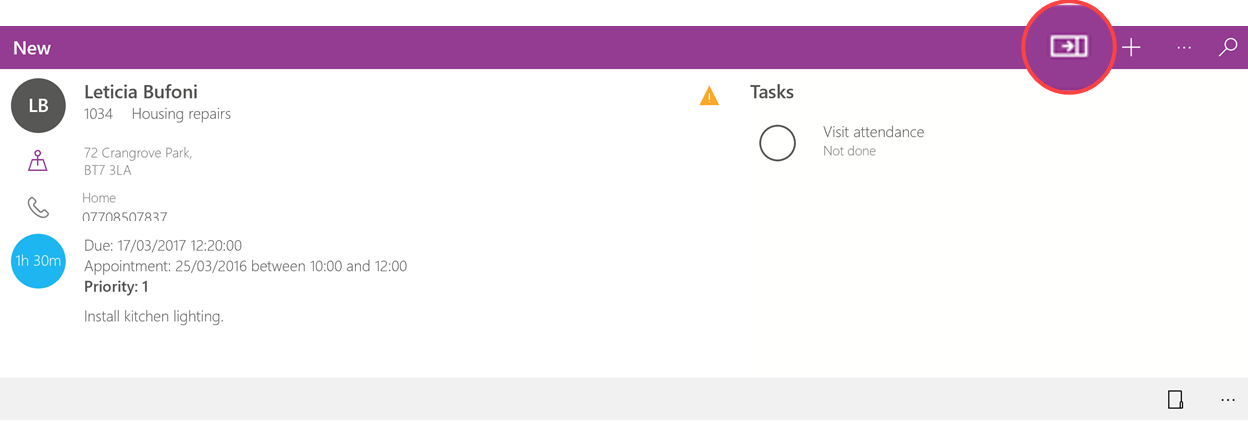
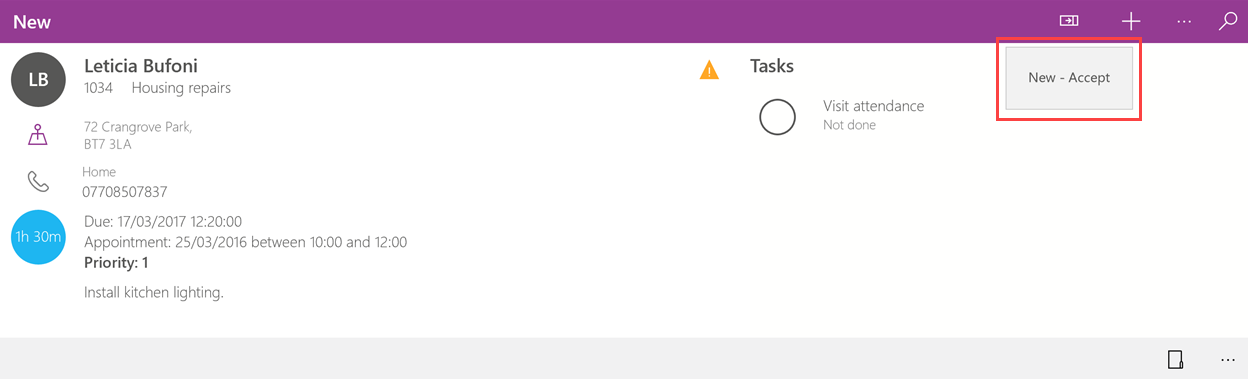
The New - Accept and Cancel options appear.
-
Touch New - Accept.
The visit is no longer a new visit and Totalmobile categorises it within the Outstanding section of visits.
-
Select Submit.
The Accept - On Way and Cancel options appear.
-
Select Accept - On Way, then select Submit .
The On Way - Arrived and Cancel options appear.
-
Select On Way - Arrived, then select Submit.
The Arrived - Complete and Arrived - Part Complete options appear.
-
Select Arrived - Part Complete.
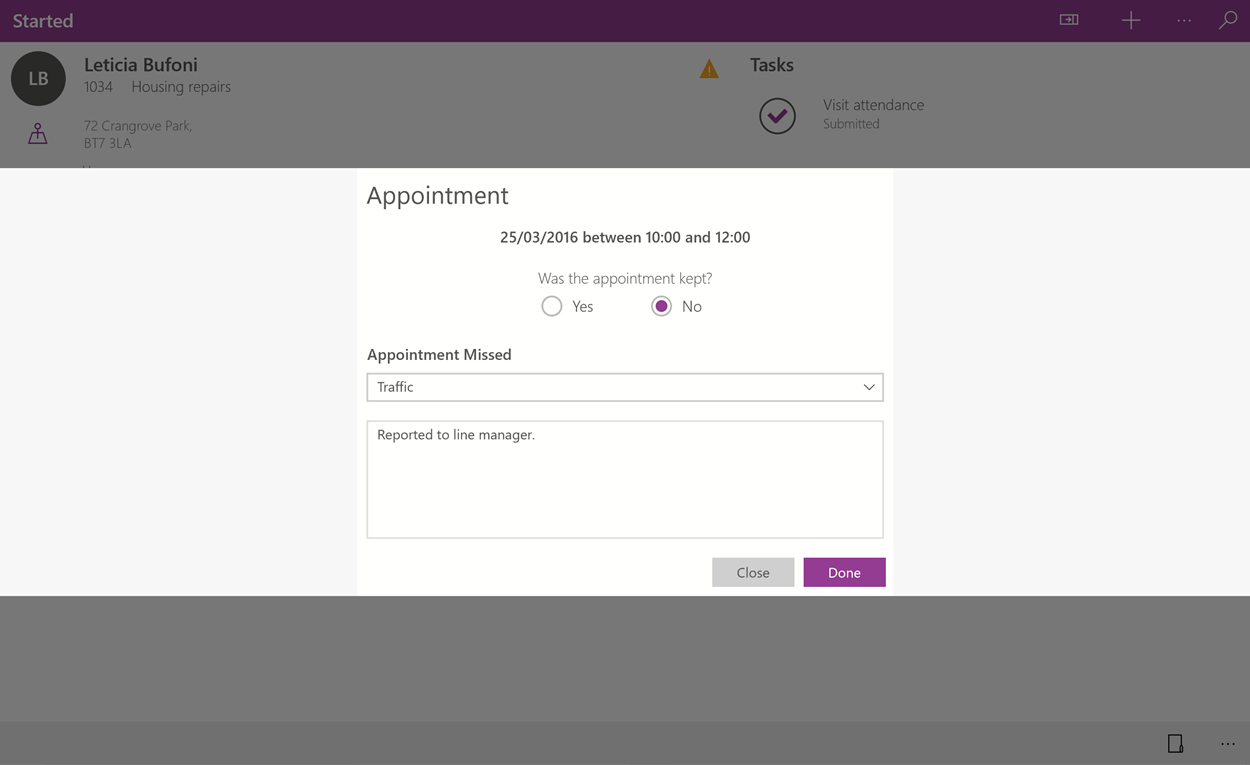
The Appointment window appears.
-
Select Yes or No for Was the appointment kept?.
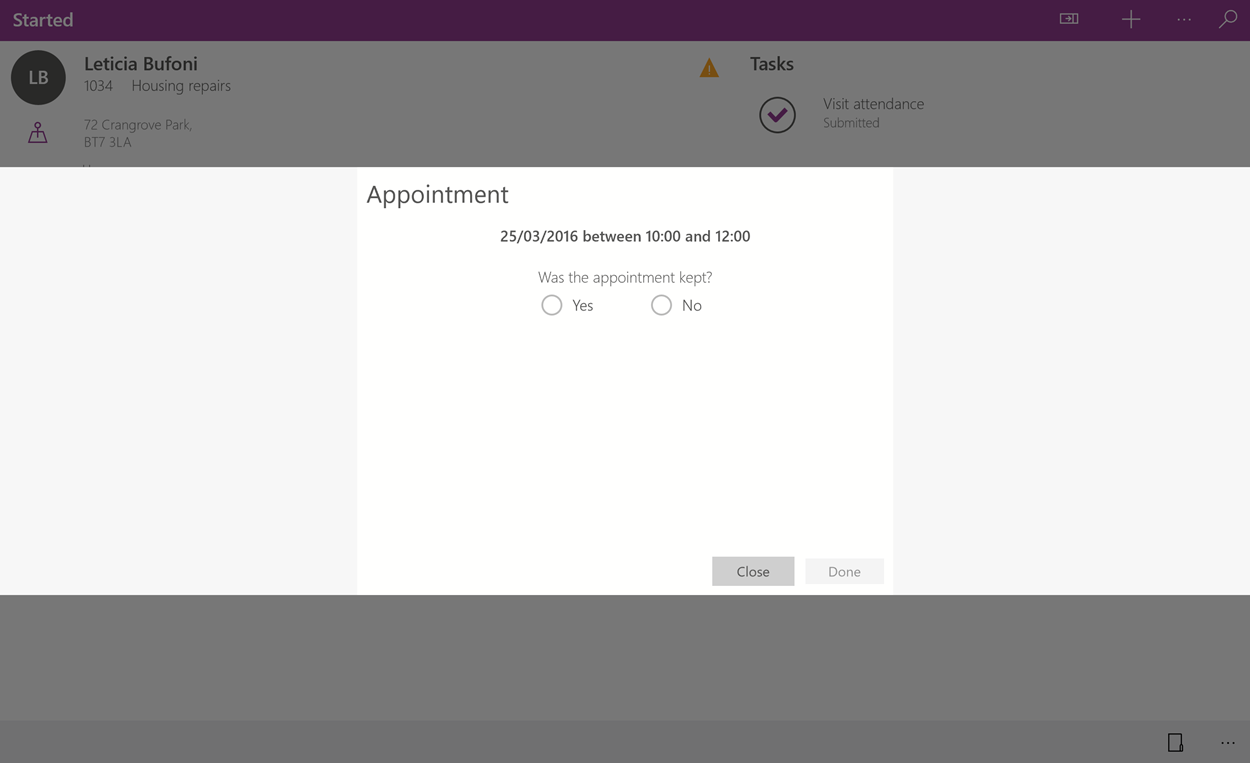
The Appointment Kept or Appointment Missed options appears.
-
Select Choose Reason and select a reason from the dropdown.
-
Enter Notes.
-
Select Done.
The visit is completed.
-