Follow Up Appointment Form Actions
In order for the follow up appointment to be available as part of the workflow, and to receive, display, and send the Schedule of Rates (SOR) information, you must configure the following form actions:
Client Actions
Set up the following Client Actions:
-
Add Follow-Up Task - this ensures the follow up appointment can be used as part of the workflow.
-
Add Job Codes - this ensures the follow up appointment shows the codes, descriptions and quantities, and calculates the durations, for any assigned SORs received with the visit.
Changes made to the Client Actions are not available to the user until the form has been published.
Add Follow-Up Task
To configure Add Follow-Up Task:
-
In WebAdmin select Forms.
-
Locate and select the required form.
-
Select Maintain form actions
 .
. The Actions and Properties panel appears.
-
Select Add New Client Action
 , then select Add Follow-Up Task from the menu.
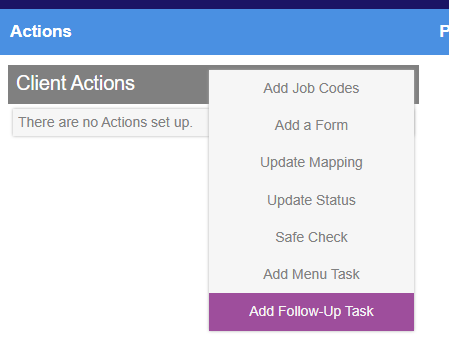
-
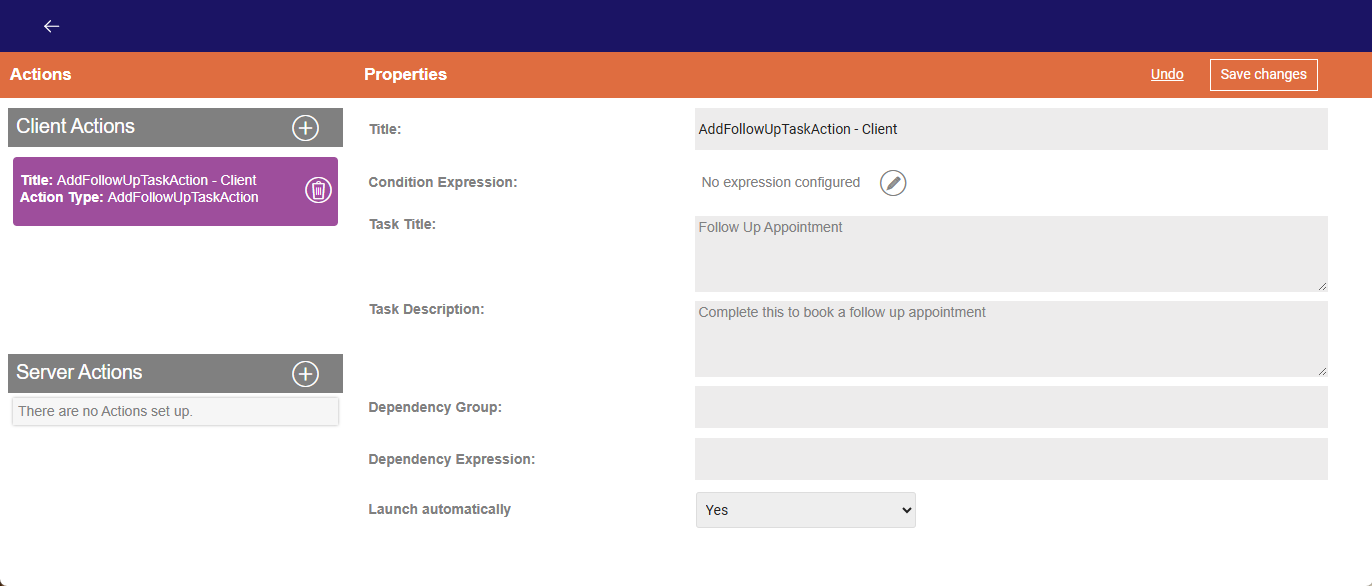
Complete the following Properties for the task:
-
Task Title
-
Task Description.
-
Launch automatically - select the dropdown, then select either:
-
Yes - the follow up appointment is automatically opened on the user's device.
-
No - the follow up appointment appears in the list of tasks for the current visit on the user's device.
-
-
-
Select Save Changes.
Add Job Codes
To configure Add Job Codes:
-
In WebAdmin select Forms.
-
Locate and select the required form.
-
Select Maintain form actions
. The Actions and Properties panel appears.
-
Select Add New Client Action
, then select Add Job Codes from the menu.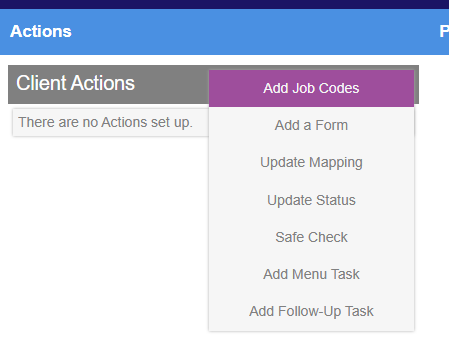
-
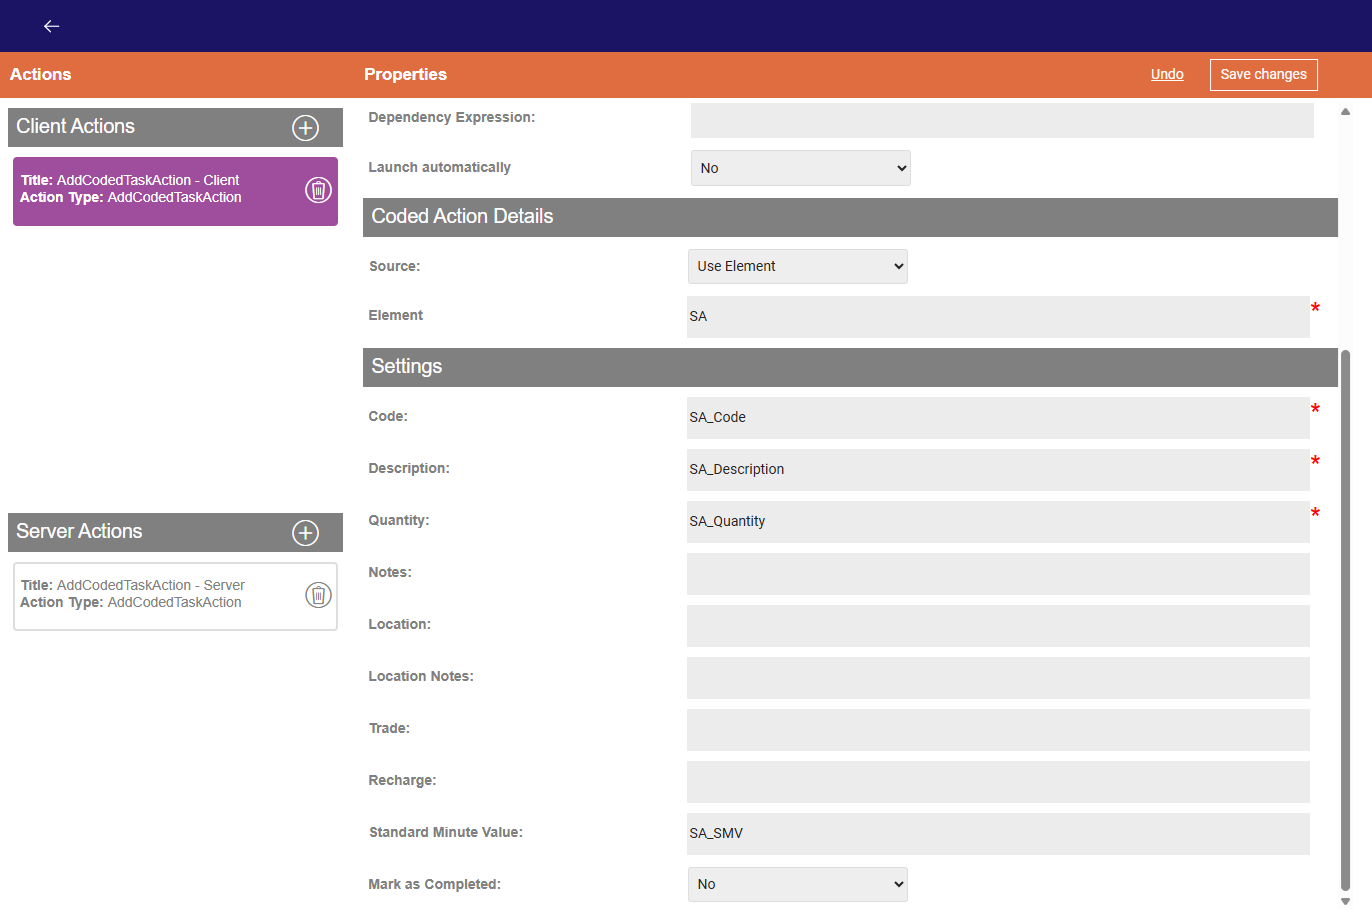
Complete the following Properties:
-
Under Coded Action Details:
-
Select the Source dropdown, then select Use Element.
-
Select the Element dropdown, then select the reference relevant to the catalogue visit element on the current form.
The list is populated with all Catalogue Visits configured against the form. Once selected, the Code, Description,and Quantity fields in the Settings section are automatically populated.
-
Select the Standard Minute Value field, then select the SMV from the list. This must be selected in order for the SOR's standard minutes value to be correctly displayed on the user's device, and to ensure the duration is correctly calculated for the follow up appointment.
-
Select the Mark as Completed dropdown, then select No. This means any SORs added to a visit while it is being progressed can be included as an item needing to be included in the follow up appointment.
-
-
Select Save Changes.
-
Server Actions
Configure the server action Add Job Codes to Connect to ensure the updated and added SORs are returned to Job Management (Connect).
Changes made to the Server Actions are not available to the user until the form has been published.
To configure Add Job Codes to Connect:
-
In WebAdmin select Forms.
-
Locate and select the required form.
-
Select Maintain form actions
. The Actions and Properties panel appears.
-
Select Add New Server Action
, then select Add Job Codes to Connect from the menu.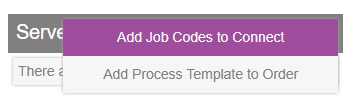
-
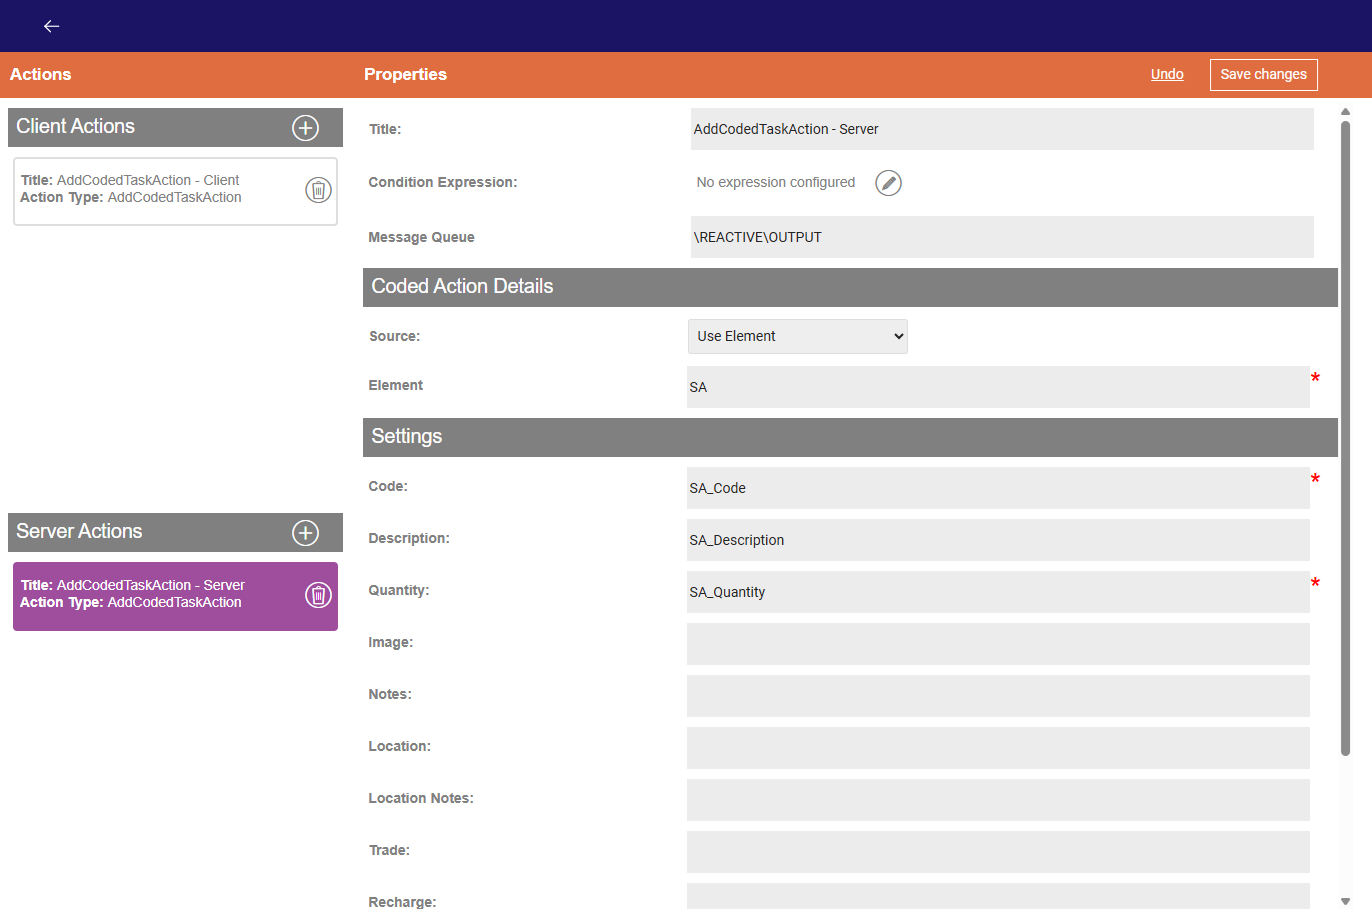
Complete the following Properties:
-
Select the Message Queue field and enter the Work Type Message Queue specific to the solution.
-
Under Coded Action Details:
-
Select the Source field, then select Use Element from the dropdown.
-
Select the Element field, then select the reference relative to the catalogue visit from the dropdown.
The list is populated with all Catalogue Visits configured against the Form. Once selected the Code, Description, and Quantity fields in the Settings section are automatically populated.
-
-
Select Save Changes.
-