CLERIC Interface
Create an Organisation UDF (Organisation > Organisation User Defined Fields) and assign it to each location you want to use the interchange for:
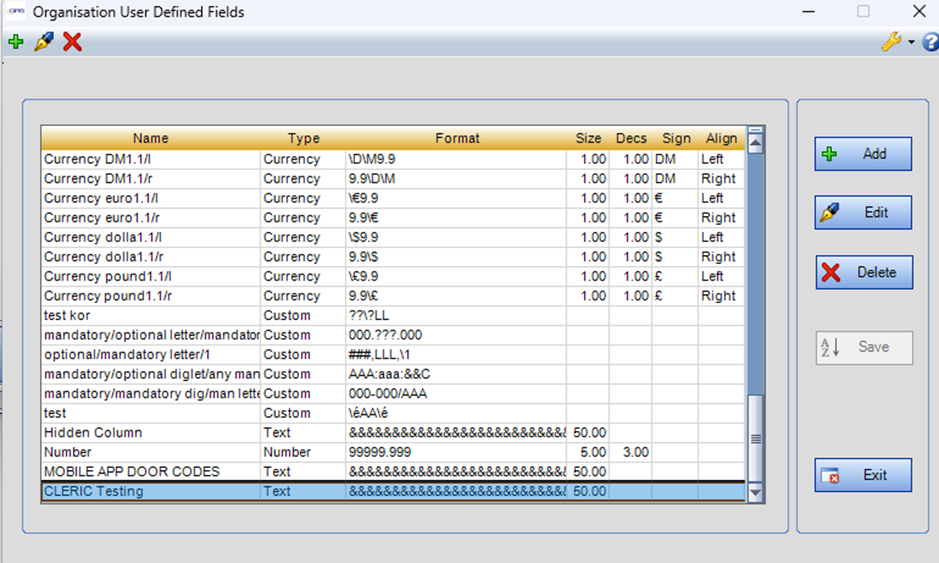
In this example, Good Hope Hospital is the only location that will be sent across the interchange.
Once this has been created, make a note of the name of the UDF and the config can be updated in the background.
Next there are two options for configuration, and they can be used in conjunction.
-
Create a personnel UDF and assign each person to send across the interchange a value for that UDF. This will be the value sent to CLERIC for their skill.
-
Set up a filter that decides which people to send across.
Any person selected by the filter instead of the UDF will not have a skill sent to cleric.
Option 1 – Personnel UDFs
Next, create a personnel UDF (Personnel > Personnel Definitions > User Defined Fields).
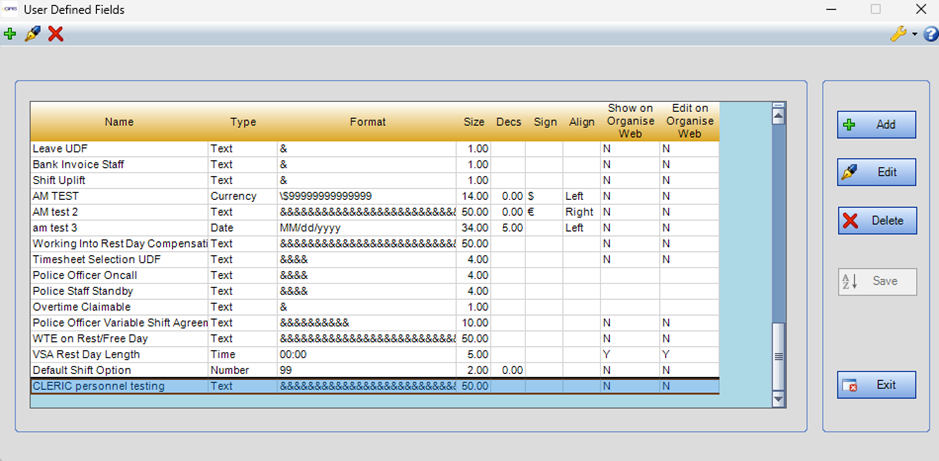
Once this has been created, make a note of the name of the UDF and the config can be updated in the background.
Option 2 - Filter
A filter can be used instead of a personnel UDF. This can be created in Tools > Filter Designer. Change to match whatever locations/people you want to use.
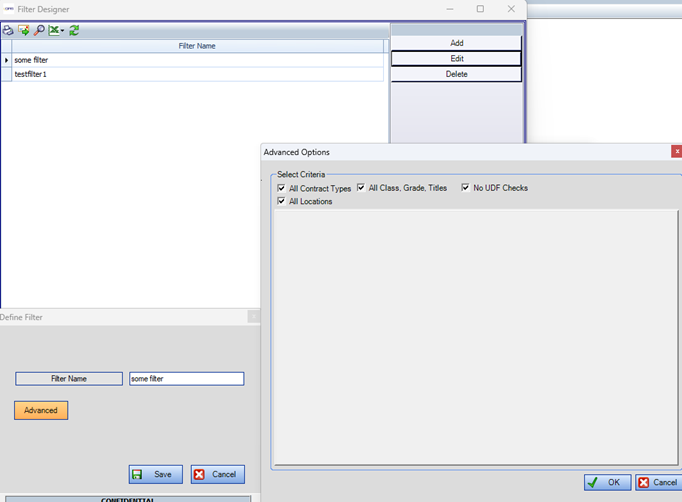
Once this has been created, make a note of the name of the filter and the config can be updated in the background.
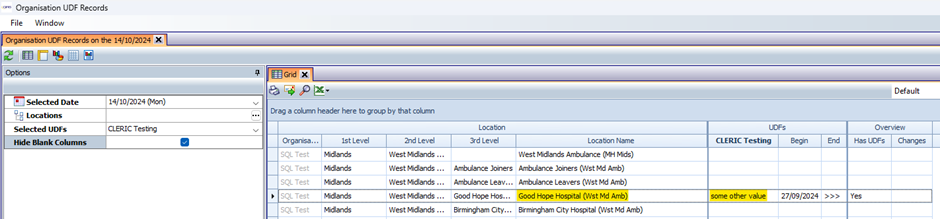
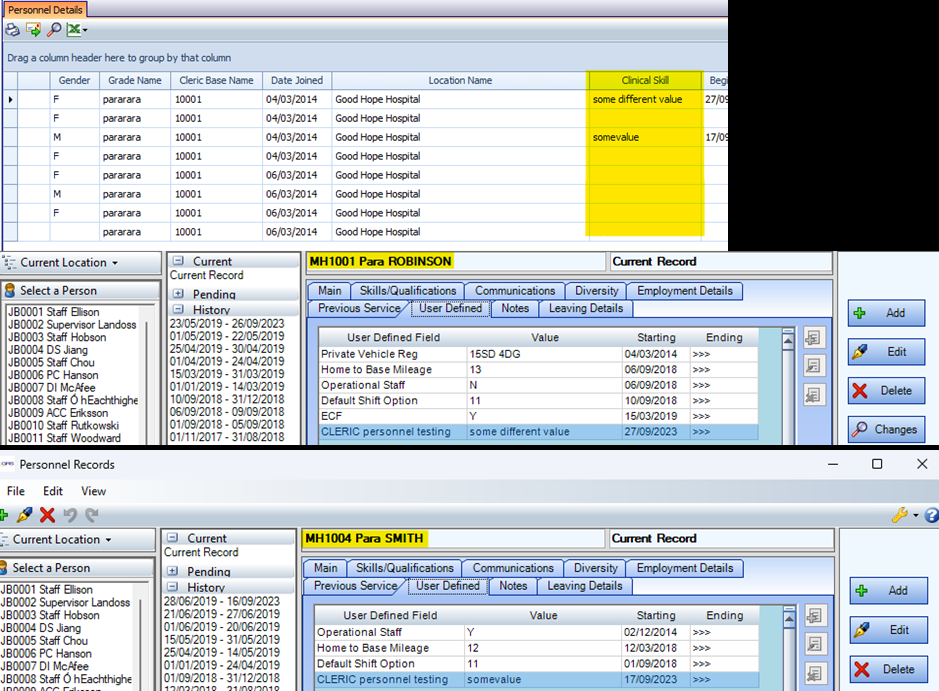
Below is an example of using both options. The Clinical Skill is populated by the UDF value, and the people with no value were selected by the filter.
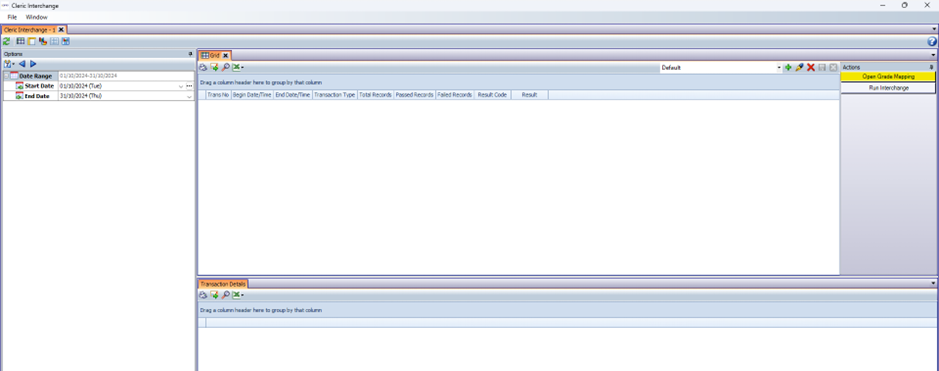
If you want different grades to be sent across the interchange, then configure a grade mapping in the
Tools > Interchanges > CLERIC Interchange screen. There should be a button on the side of the screen that says Open Grade Mapping.
This will open a screen where grade mappings can be added and edited.
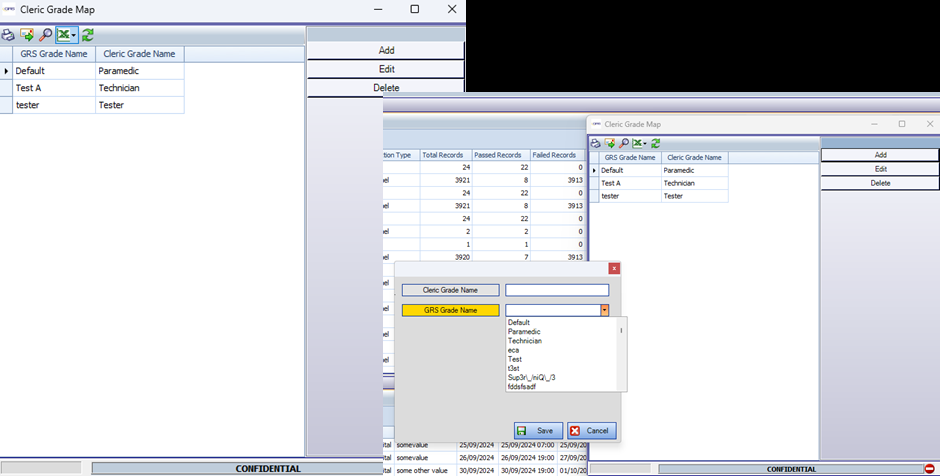
If there is no grade mapping present for the person’s GRS grade, then it will look for a ‘Default’ set at the top of the grade mapping droplist. If that is not present, it will default to the value set up in the config table.
Once this is done and the background config has been updated then the interchange should be ready to go. It can be configured to run on a schedule or can be run manually using the ‘Run Interchange’ button on the CLERIC report.