Adding GeoPal Users
Adding Users
On the left-hand side, menu click the Configuration tab, then click on Users.
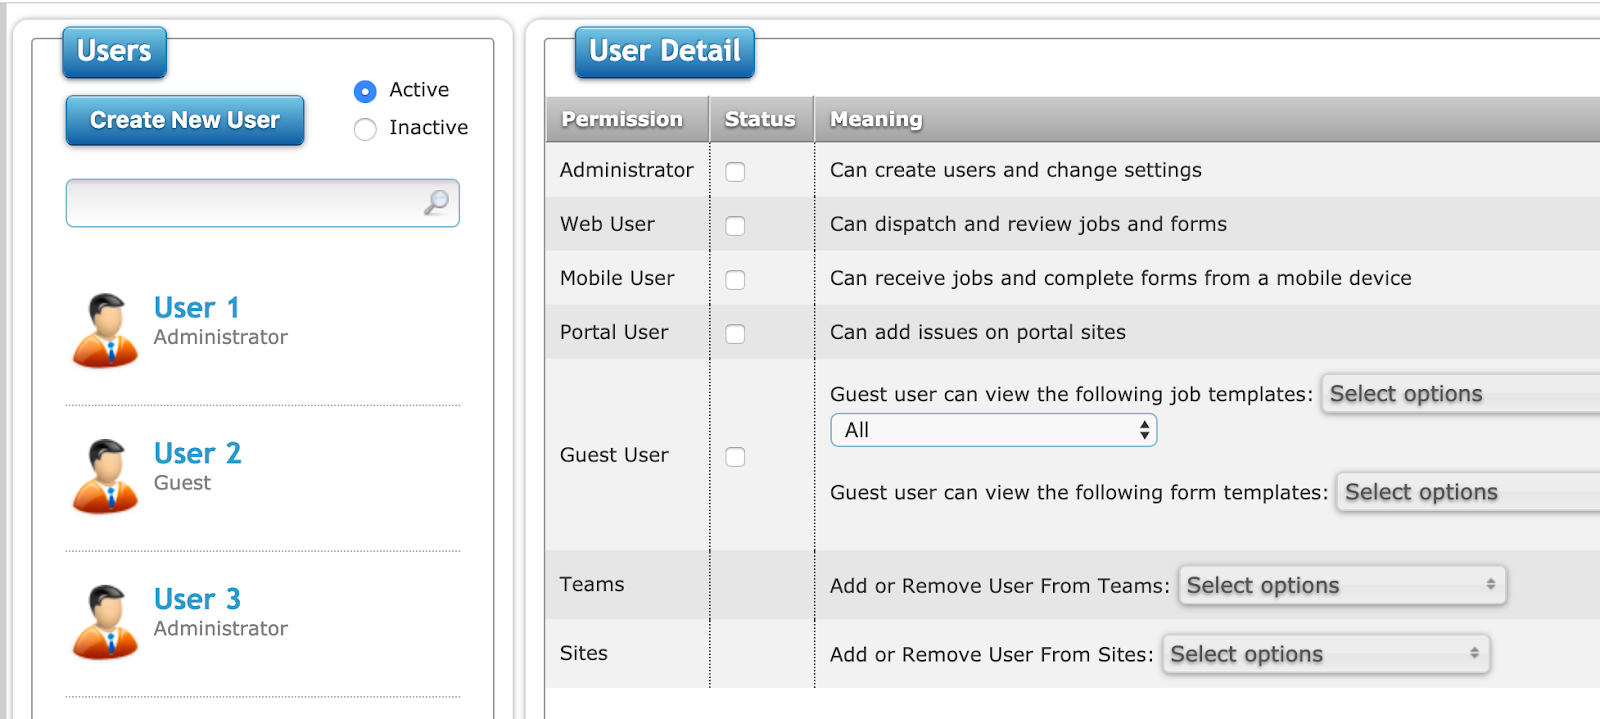
On the left-hand side is the list of all current users and this is also searchable. You can also sort by Active and Inactive users. Active will be selected by default.
To begin creating new users, select Create New User on the left and select what user profile type you would like your new user to have. Users can have multiple profiles.
-
Administrator: Full access to both through mobile and web views, as well as user management.
-
Web: Have web access only.
-
Mobile: Have mobile access only.
-
Portal: Limited view of web. (contact GeoPal for information)
-
Guest: Limited web view access. (contact GeoPal for information)
-
Teams: Limited access to mobile users.
-
Sites: Limited access to mobile users.
Under User Detail, enter the following:
-
First Name (compulsory)
-
Last Name (compulsory)
-
Email (Optional) Used to send users emails automatically set up with Runbooks.
-
Mobile (Optional) Used to message users from GeoPal. There is an additional charge for SMS messages.
-
Username (compulsory) GeoPal recommend using an email address.
-
Password (compulsory)
-
Confirm Password (compulsory)
-
Timezone (compulsory) Set at Company Settings.
-
Language (compulsory) Set at Company Settings.
When the above details have been filled in, click Save to create a user profile.
Removing Users
In GeoPal we deactivate users we do not delete users.
On the left navigation, select Configuration > Users.
-
Select the user you wish to deactivate.
-
Below the User Detail, you will see a Deactivate button, once selected this user will become inactive and will not be able to log in to GeoPal using their credentials.
Filter the Permissions list
-
You can filter by Name by type a name into the search bar or
-
You can filter by team.