Asset Register - Filtering
Filtering in the Asset Register lets you easily locate and narrow down assets based on various categories and criteria. Filters can be configured, applied and managed as needed.
Asset Register Filtering - List View vs. Hierarchy View
List View
In the List view, all your assets are listed in a non-hierarchical view, meaning all parent and child assets are listed. This means filters are applied to all assets individually, regardless of their position in a hierarchy.
-
This includes both parent and child assets.
-
Each asset is evaluated independently against the filter.
-
Results include any asset meeting the criteria, offering the most granular level of filtering.
Hierarchy View
In the Hierarchy view, the assets are shown in a structured tree with parent assets and their associated child assets. This means filters are applied only to the parent asset.
-
Filters are evaluated exclusively at the parent level.
-
Child assets are shown based on their relationship to filtered parent assets, but are not directly evaluated by the filters applied.
-
If a child matches the filter but the parent does not, that group does not appear in the results.
Accessing Filters
To access the filter on the Portfolio page > Asset Register tab:
-
Select Filters.
-
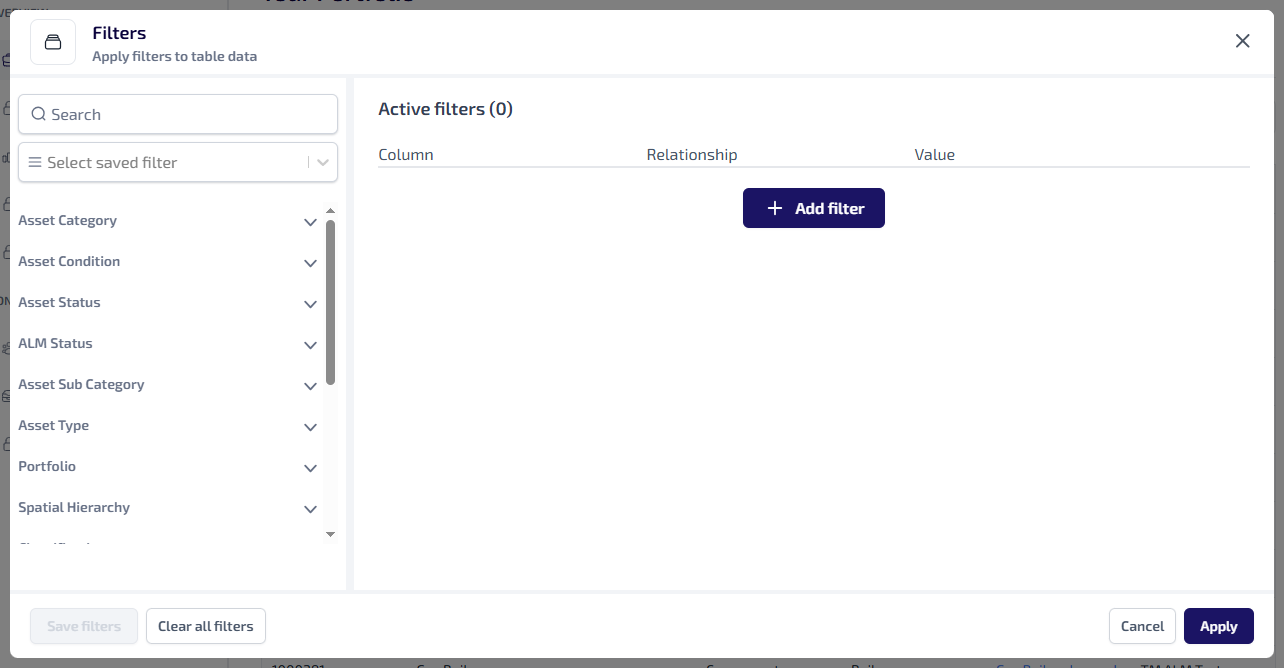
The Filters dialog appears.
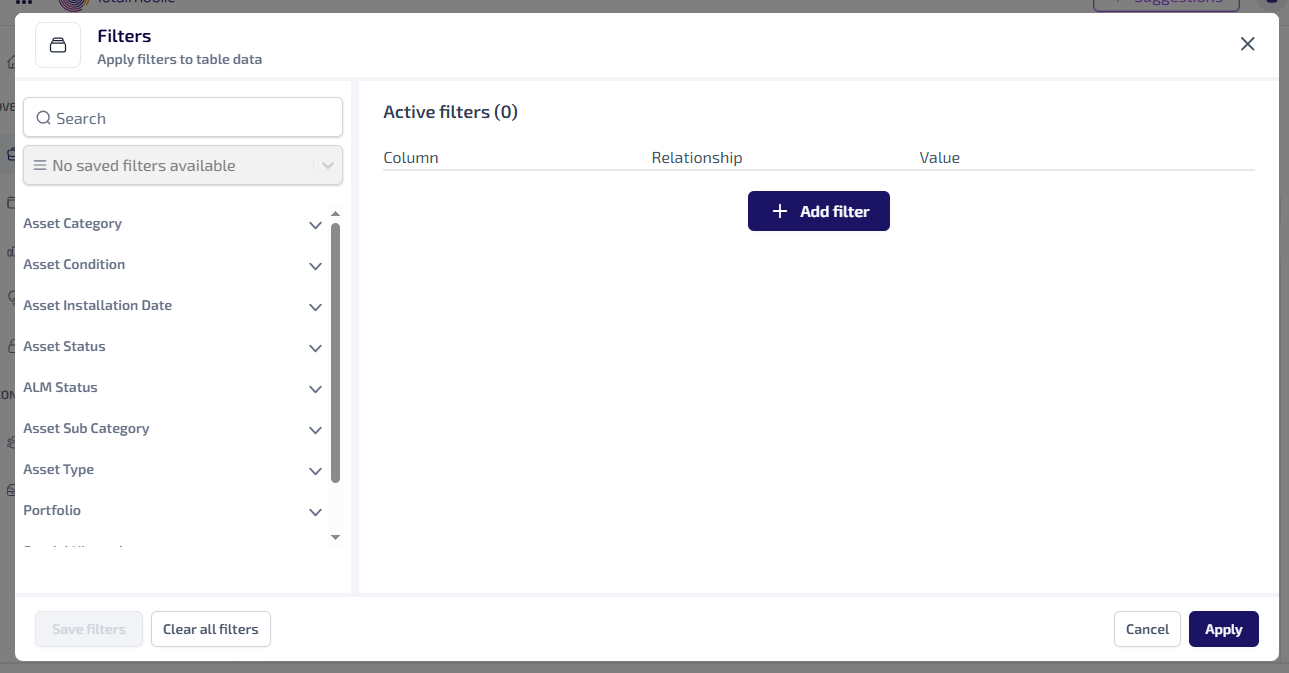
The Filters dialog has 3 main sections:
-
Filter panel - on the left of the dialog:
-
Lists the available categories such as, Portfolio, Asset Type, and Asset Condition.
-
Show More - when expanded categories initially show 20 items. Select Show More to load additional items.
-
Search* - the search field can be used to quickly find an item, using the name and code/symbol (for Classification and Spatial Hierarchy**).
-
Select Saved Filter - this is a dropdown list of filters you have saved previously. Select one from the dropdown list to use.
-
-
Active Filters panel - on the right of the dialog:
-
Shows all current selected filters.
-
Each filter appears in a separate row.
-
Add Filter - select to manually create a new filter.
-
Delete - select to remove an individual filter.
-
-
Footer buttons - at the bottom of the dialog:
-
Save Filters - saves the current filters for future use. You’ll need to provide a Name, and optionally a description.
-
Clear All Filters - removes all filters at once.
-
Cancel - closes the dialog without applying any changes.
-
Apply - applies the current set of filters and closes the dialog.
*The Search field is a ‘begins with’ search, therefore ensure the text entered is always the beginning word/s of what you are searching for.
**The Classification and Spatial Hierarchy categories are only available for assets originating from portfolios using the TM ALM 1.0 data model.
-
-
Filter Using Category Panel
To use the filter categories panel:
-
Select the
 to expand the required category.
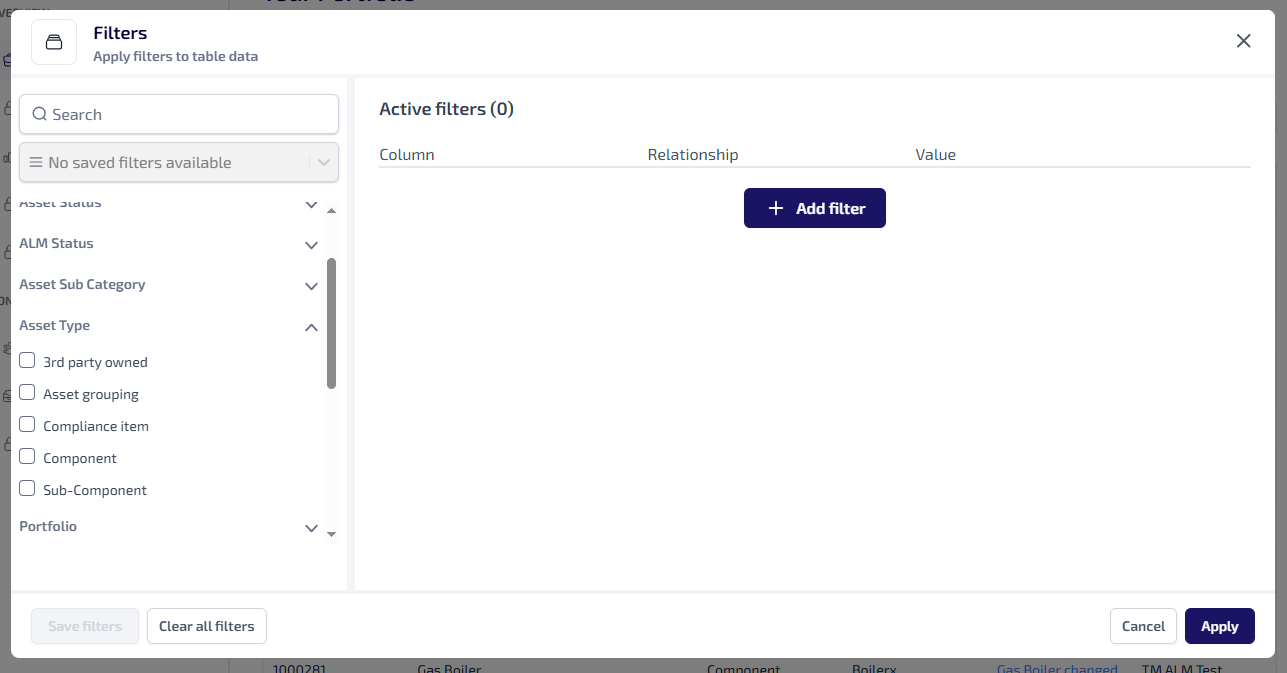
-
Select the checkboxes for the required categories.

-
A corresponding filter automatically appears in Active Filters, pre-populated with:
-
Column - the selected category.
-
Relationship* - Is equal to
-
Value - the selected category item
-
-
If required, select any additional categories.
-
Select Apply.
-
All matching results are shown.
*Currently the only relationship supported by all filters is Is equal to.
When filtering by Asset Installation Date and using a Custom Date Range, ensure the From date is earlier than or equal to the To date.
Filter Using Add Filter
To use the filter categories panel:
-
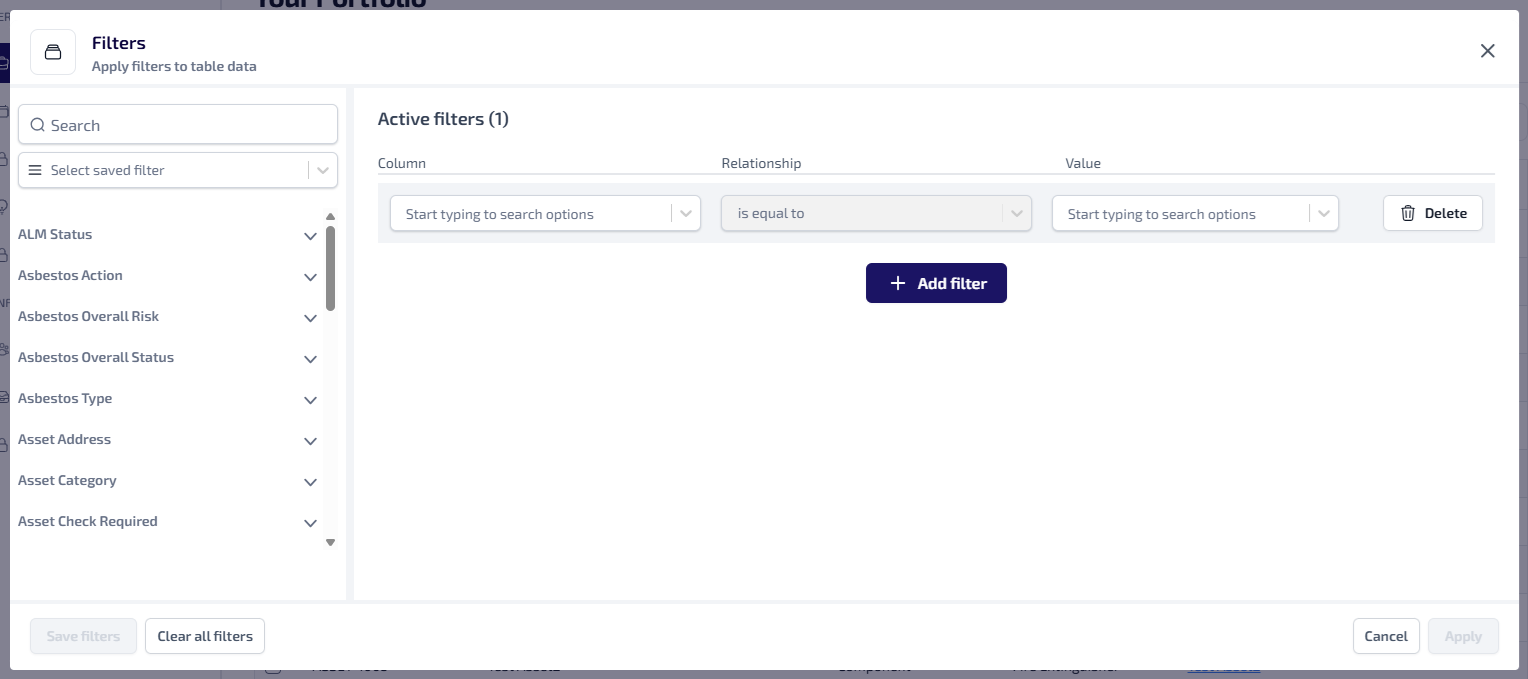
Select Add Filter.
-
An empty line is added to Active Filters.
-
Enter the following filter details:
-
Select the Columns dropdown, or start typing into the field, to find the required category.
-
The Relationship* defaults to Is equal to.
-
Select the Value dropdown, or start typing the into the field to find the required value. The contents of the dropdown depends on the category selected in the Columns dropdown.
-
-
If required, select Add Filter to add more filters.
-
Select Apply.
-
All matching results are shown.
*Currently the only relationship supported by all filters is Is equal to.
When filtering by Asset Installation Date and using a Custom Date Range, ensure the From date is earlier than or equal to the To date.
Saved Filters
Filters can be saved, so they can be easily applied again without needing to be configured each time.
Filters you save are only usable by you. They are not available for other users.
Saving Filters
To save filters for future use:
-
Select the required categories and apply the filters, as detailed in the Filter Using Category Panel and Filter Using Add Filter sections.
-
On the Filters dialog, select Save Filters.
-
The Save Filter Configuration dialog appears.
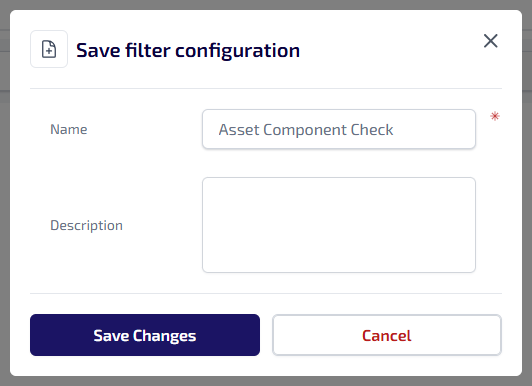
Enter the following:
-
Name* - a unique name for the filter.
-
Description - a description of the filter. This is an optional field.
*This is a required field.
-
-
Select Save Changes.
Filters you save are only usable by you. They are not available for other users.
Using Saved Filters
To use a saved filter:
-
Select Filters.
-
The Filters dialog appears.
-
Select the Select Saved Filters field to see a dropdown list of all your saved filters.
-
The saved categories and configured filters appear in Active Filters.
-
Select Apply.
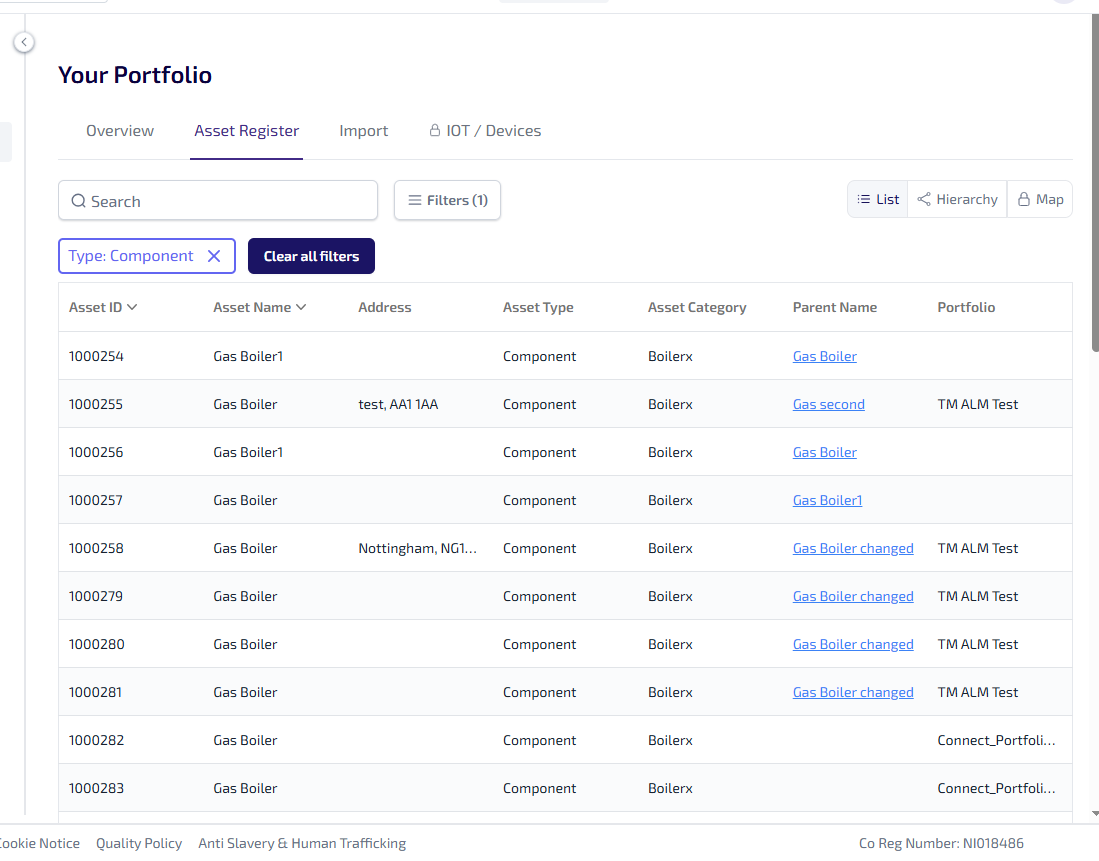
Applied Filters on Asset Register
When a filter is applied to the Asset Register, the table updates to only show the matching results.
-
The applied filters are shown as individual buttons above the table.
-
Depending on the number of filters applied, the buttons automatically wrap into additional rows.
-
Clear All Filters - select to remove all the applied filters.
-
X - select to remove the individual filter.