Warranties
The Asset Details > Warranties tab lets you manage all the warranty type information relevant to the asset.
The types of warranty information which can be added to an asset are:
-
Warranty - a product specific replacement/repair assurance offered by a manufacturer where labour is usually excluded. It is common for warranties to overlap and exceed a DPL. An example would include a heating upgrade utilising boiler with a five year manufacturers warranty, where as the first twelve months is covered by the installation contractor under the defects period and the physical boiler is covered for the subsequent four years under the warranty via parts being supplied free by the manufacturer to the servicing/repair company.
-
DLP (Defect Liability Period) - normally associated with a building contract and allied to a financial retention. Dependant on contract terms typically all labour and materials are covered. Examples include New Build properties - Whole House and Capital Component Replacements - Kitchens, Roofs, Bathrooms, Heating upgrades etc.
-
Guarantee - similar to DLPs but covering minor maintenance work elements such as Relets and larger repairs. The period of guarantee is agreed with the contractor or is covered within the maintenance contract under which the works were carried out.
-
Cover Plan - this type of cover is broader than standard warranty, offering a more comprehensive protection. It refers to various types of protection such as extended warranties, or specific service contracts, and can cover a wider range of issues including accidental damage, wear and tear, and mechanical breakdown.

The Warranties tab shows the following information:
-
External ID - the external identification reference.
-
Reference Number - the warranty reference number.
-
Type - the type of warranty, which is either going to be going to be Warranty, DLP, Guarantee, or Cover Plan.
-
Start Date - the warranty start date.
-
End Date - the warranty end date.
-
 - select for the following options:
-
View - select to view the warranty.
-
Edit - select to edit the warranty.
-
Delete - select to delete the warranty.
-
Add Warranty
To add a warranty:
-
From the Portfolio page, select the asset in the Asset Register.
-
Select View Asset.
-
The Asset Details page is shown, select the Warranties tab.
-
Select the + Add Warranty.
-
The Add Warranty dialog appears.
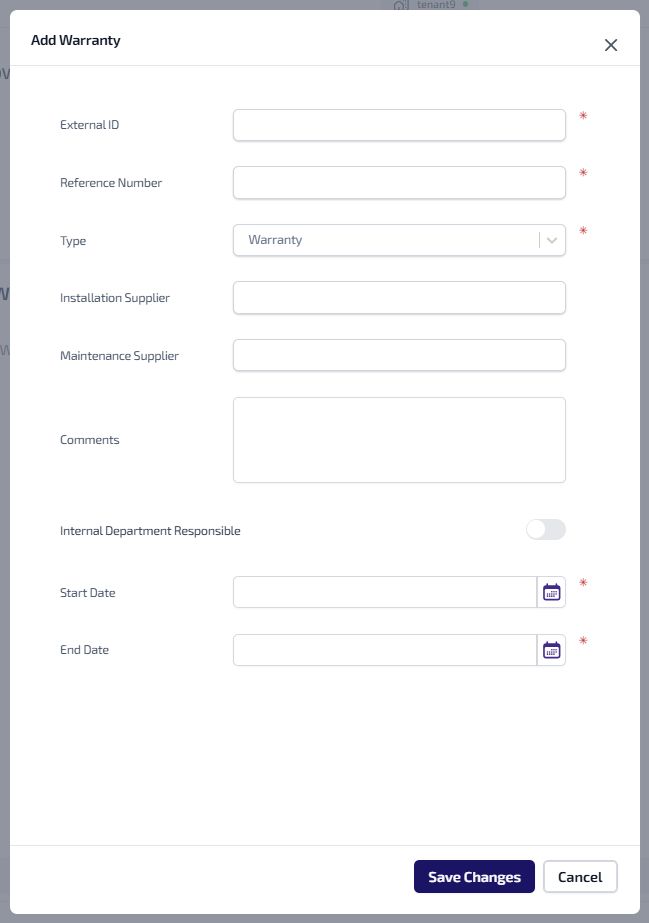
Enter the following information for the warranty.
-
Enter the External ID*.
-
Enter the Reference Number*.
-
Select the Type* dropdown, then select the type of warranty you want to add. The options are:
-
Warranty
-
DLP
-
Guarantee
-
Cover Plan
-
-
Enter the Installation Supplier.
-
Enter the Maintenance Supplier.
-
Enter any Comments.
-
Select the Internal Department Responsible toggle to show whether an internal department is responsible for the warranty.
-
Select the Start Date* field and select the start date of the warranty from the calendar.
-
Select the End Date* field and select the end date of the warranty from the calendar.
-
Level of Cover appears if you select Cover Plan as the Type. Select the Level of Cover dropdown, then select the level of cover required. For more information refer to System Data - Warranty Level of Cover.
-
Select Save Changes.
*These are required fields.
View Warranty
To view a warranty:
-
From the Portfolio page, select the asset in the Asset Register.
-
Select View Asset.
-
The Asset Details page is shown, select the Warranties tab.
-
Select the
against the warranty to be viewed. -
Select View from the context menu.
-
The View Warranty dialog appears.
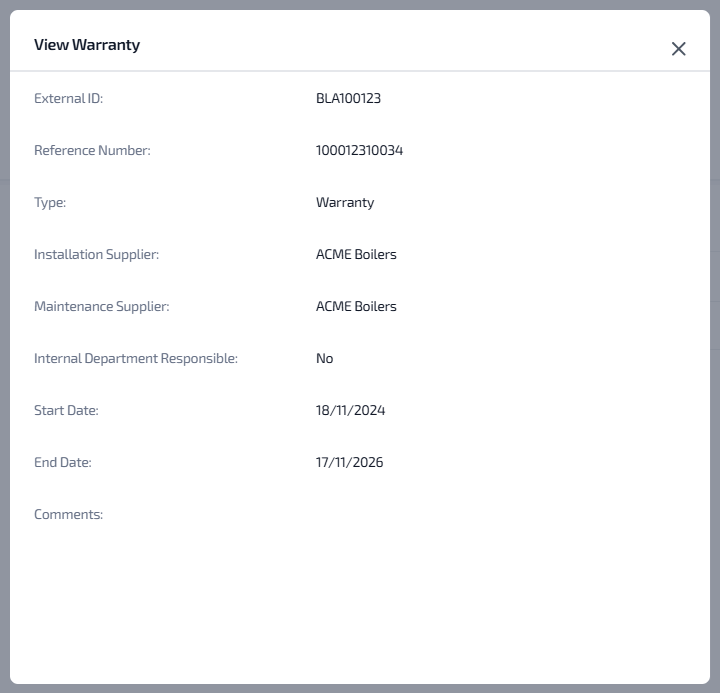
The following information is shown:
-
External ID - the external identification reference.
-
Reference Number - the warranty reference number.
-
Type - the type of warranty, which is going to be either Warranty, DLP, Guarantee, or Cover Plan.
-
Installation Supplier - the name of the company who installed the asset.
-
Maintenance Supplier - the name of the company who maintain the asset.
-
Internal Department Responsible - whether an internal department is responsible of the warranty.
-
Start Date - the warranty start date.
-
End Date - the warranty end date.
-
Level of Cover - this appears if the warranty type is a Cover Plan, and shows level of cover.
-
Comments - any comment about the warranty.
-
Edit Warranty
To edit a warranty:
-
From the Portfolio page, select the asset in the Asset Register.
-
Select View Asset.
-
The Asset Details page is shown, select the Warranties tab.
-
Select the
against the warranty to be edited. -
Select Edit from the context menu.
-
The Edit Warranty dialog appears.
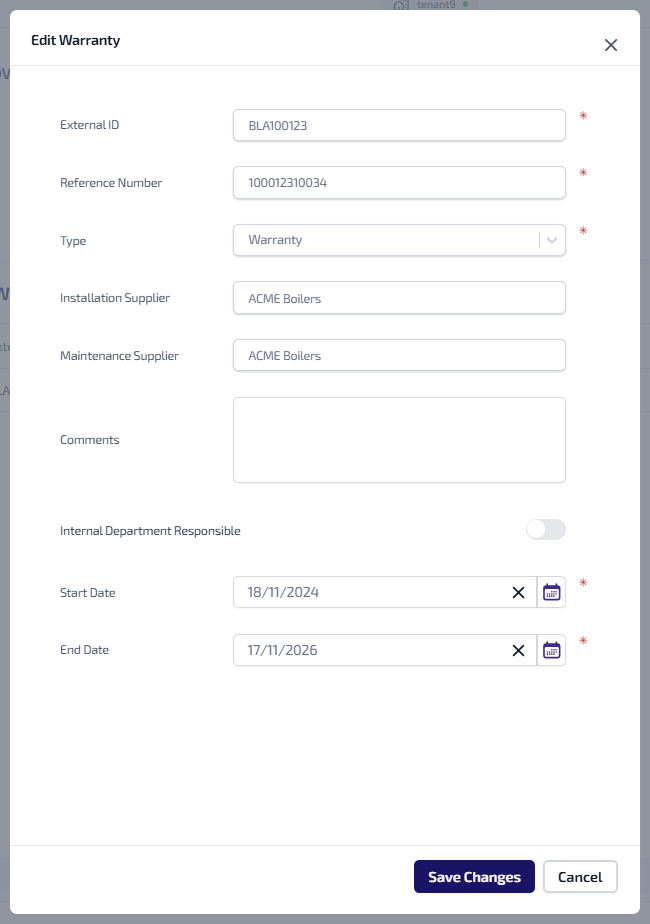
Update any of the following warranty information:
-
External ID* - the external identification reference.
-
Reference Number* - the warranty reference number.
-
Type* - the type of warranty, which can be either Warranty, DLP, Guarantee, or Cover Plan.
-
Installation Supplier - the name of the company who installed the asset.
-
Maintenance Supplier - the name of the company who maintain the asset.
-
Comments - any comment about the warranty.
-
Internal Department Responsible -
-
Start Date* - the warranty start date.
-
End Date* - the warranty end date.
-
Level of Cover - if applicable, level of cover required for the Cover Plan.
-
-
Select Save Changes.
*These are required fields.
Delete Warranty
To delete a warranty:
-
From the Portfolio page, select the asset in the Asset Register.
-
Select View Asset.
-
The Asset Details page is shown, select the Warranties tab.
-
Select the
against the warranty to be deleted. -
Select Delete from the context menu.
-
The warranty is deleted from the Warranties tab.