Catalogue Element Control
The Catalogue Element control allows mobile users to add materials in a form from the order catalogues that they are assigned to. The searchable products are displayed as a list and users can add the appropriate quantity.
You define order catalogues on the WebAdmin > Materials page. For more details refer to Add an Order Catalogue.
Configure the Catalogue Element Control
The Catalogue Element control displays options relating to a previous element. There are two stages to the configuration:
-
Create a List control with a Source Ref of MaterialsOrderCatalogueList. This displays the order catalogues the user is assigned to as a list in the form.
-
Create a Catalogue Element control after the List control. The Source Ref for the this control is the Reference of the List control.
1. Create the List control
-
In WebAdmin, select Forms.
-
Navigate to an existing element within your form or select Insert a new Element
 .
-
Select Maintain element settings
 .
-
In the Update Element Details dialog:
-
Select the List control.
-
Select the Text field, and enter a description for the control.
-
Toggle Barcode to On or Off as required.
-
Select the Source Ref field, and enter MaterialsOrderCatalogueList.
-
Configure other control options as required. For more details refer to Form Sections and Controls.
-
Select Save.
-
2. Create the Catalogue Element Control
-
Select Insert a new Element
after the List element. -
Select Maintain element settings
. -
In the Update Element Details dialog:
-
Select the Catalogue Element control.
-
Select the Text field, and enter a description for the control.
-
Select the Source Ref field, and enter the Reference from the preceding list control.
-
Enter the Minimum number of products that can be selected from the list. This does not restrict the quantity of each product that can be selected.
-
Enter the Maximum number of products that can be selected from the list. This does not restrict the quantity of each product that can be selected.
-
If required, enter the Mapping Source.
This is used to map additional properties to the form. When you enter an additional properties parent in this field, the children are available for visit mapping for the element. For more details refer to Mapping. -
Select Save.
The element appears in the form with a set of pre-defined sub-elements.
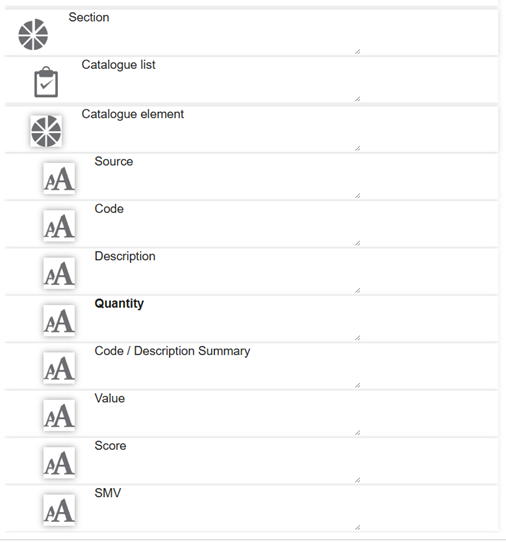
-
-
If you entered a mapping source when configuring the control:
-
In the Source field, select Maintain element mappings
 .
-
Select the Visit Mapping field, and select an additional field property from the dropdown.
-
Toggle the Direction to In, Out, or Both.
-
Select Add
 .
-
Select Save.
-
Repeat the above steps for the Code, Description, Quantity and Value fields.
-
-
Save
 and Publish
 the form.
-
Ensure the form is assigned to an application or visit task within a solution.
Using the Catalogue Element Control
 On Android
-
On the device, navigate to the form.
-
Select the List control within the form.
-
Select an Order catalogue.
-
Select the Catalogue Element control.
-
In the Order Catalogue screen:
-
Type to filter the products.
-
Tap on the number to increase the quantity, or select and hold the quantity to increase in increments of 10.
-
To edit the quantity select the product. In the Enter Value screen:
-
Enter a quantity.
-
Select OK.
-
-
To discard the quantity, select and hold the product. In the Discard confirmation window, select YES.
-
Select the tick icon.
-
-
Select Submit.
On iOS
-
On the device, navigate to the form.
-
Select the List control within the form.
-
Select an Order catalogue.
-
Select the Catalogue Element control.
-
In the Order Catalogue screen:
-
Type to filter the products.
-
Tap on the number to increase the quantity, or select and hold the quantity to increase in increments of 10.
-
To discard the quantity, swipe left on the product and select Clear.
-
Select Done.
-
-
Select Submit.